If you are wondering how to create a LinkedIn Company Page, this step-by-step guide will help you get set up and ready to go so you can start building your company presence.
Before you get started, you will need a few things. You will need access to company assets, such as a logo and other graphics.
It’s also important to make sure you have the authority to create the page. Lastly, you will need to already have an existing and active personal LinkedIn profile.
Step 1: Create the Page
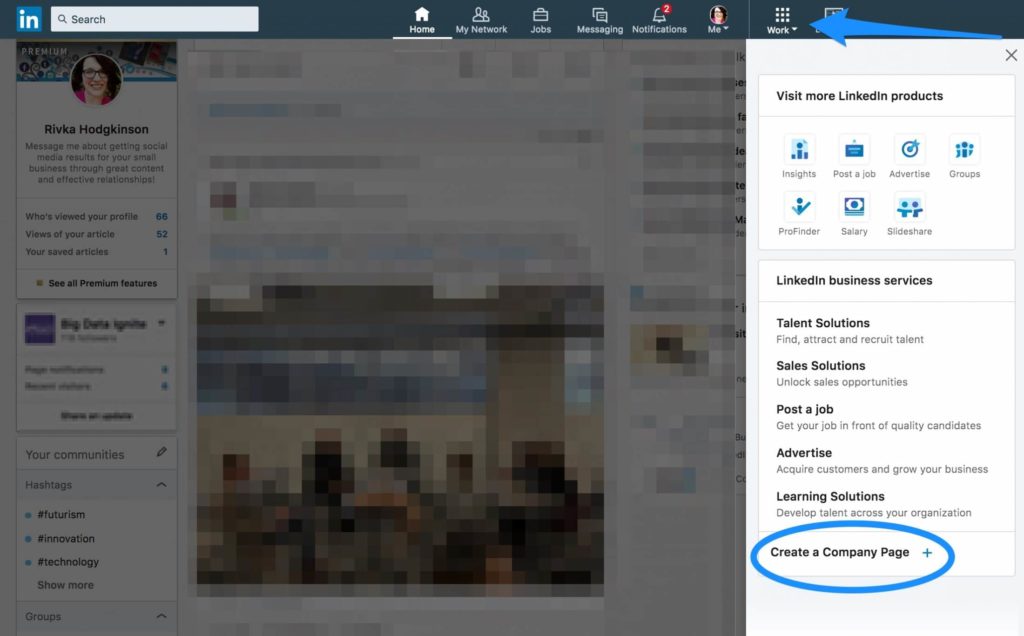
The button for creating your page is something that was moved around after the last LinkedIn update, so you might have a little trouble finding it if you don’t know where to look.
Click on the “Work” tab in the upper right-hand corner of the page. Then scroll all the way to the bottom of the list to “Create a Company Page” and click on the plus sign.
You can set up a page with any personal account, whether you are a Premium member or not. However, you will want to have a personal account that is fully filled out and has been active.
If you set up an account for the first time just to make a company page, you might have to wait for a couple of weeks before setting up your company page.
Step 2: Set Your Basic Information
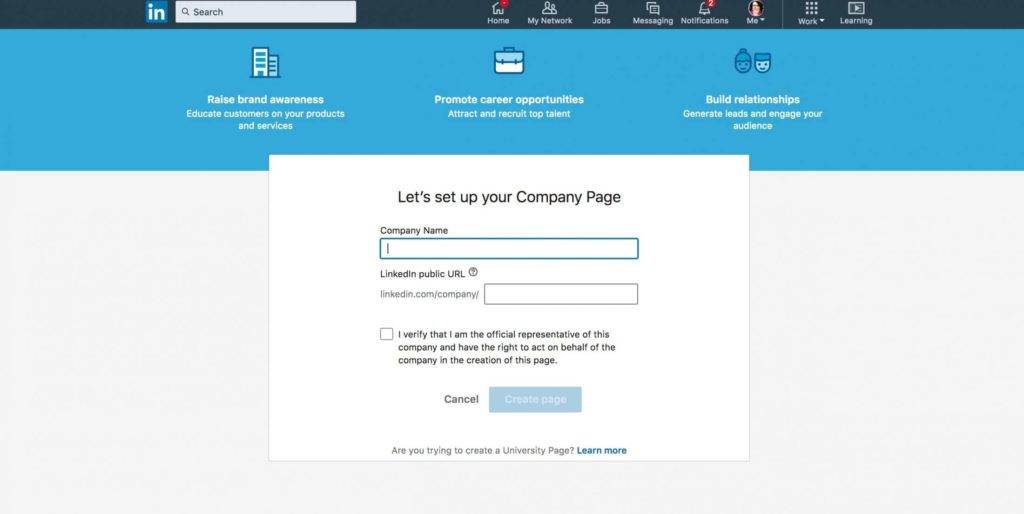
The first page you will come to will allow you to do the initial setup of your page. First, enter your business name with the full title case as you want it to appear on your LinkedIn company page.
In the second box, enter your name the way you want it to appear in the URL for your business. LinkedIn will automatically fill this in with dashes between each word from the company name that you entered, but you can change this to make it more brand-appropriate and easier to type.
You might want to make it a single word without the dashes or match it to the URL of your other social media accounts.
For example, if your business name is Strategic Technology Advanced Research, LinkedIn will automatically create your URL to be: linkedin.com/company/strategic-technology-advanced-research.
You may want to update this to be: linkedin.com/company/strategictechnologyadvancedresearch.
Or, if you regularly use the acronym STAR in your marketing (and it is available as an URL), then you could simply have linkedin.com/company/star. This is much shorter and easier to remember.
Finally, you have to verify that you are the official company representative and have the authority to create a page.
You may note in the image above that it gives you an additional option if you are trying to create a University page.
This is because there are additional features for colleges and universities, such as an alumni section. You have to contact LinkedIn separately to set that up for your LinkedIn company page if you qualify.
Step 3: Add Your Branding to Your LinkedIn Company Page
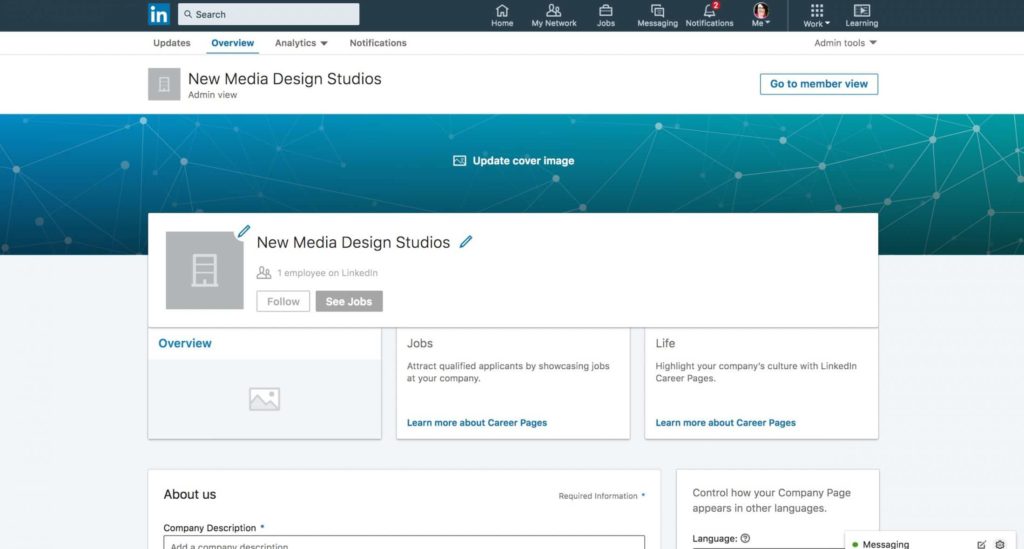
Right now on your LinkedIn company page, the only thing identifying that this page belongs to you is the company name. Time to make it look like the rest of your brand!
The first step is to add a cover image. Because this shows up as many different sizes throughout LinkedIn, and displays differently on mobile and desktop, you will want to avoid any image that has words or text. Stick to an image that represents your brand and colors in a visual way. The ideal dimensions for the cover image is 1536 x 768 px.
Secondly, you will need to add a logo. Your logo should be 300 x 300 px in size. Typically, it is best to put a square version of your logo here, again without words as in most cases the text won’t be readable.
If you are a very small business and you don’t have an appropriate logo, you could consider a profile picture of the owner or founder. But most businesses that small will benefit more from a personal profile than a business page anyway.
Step 4: Describe Your Company
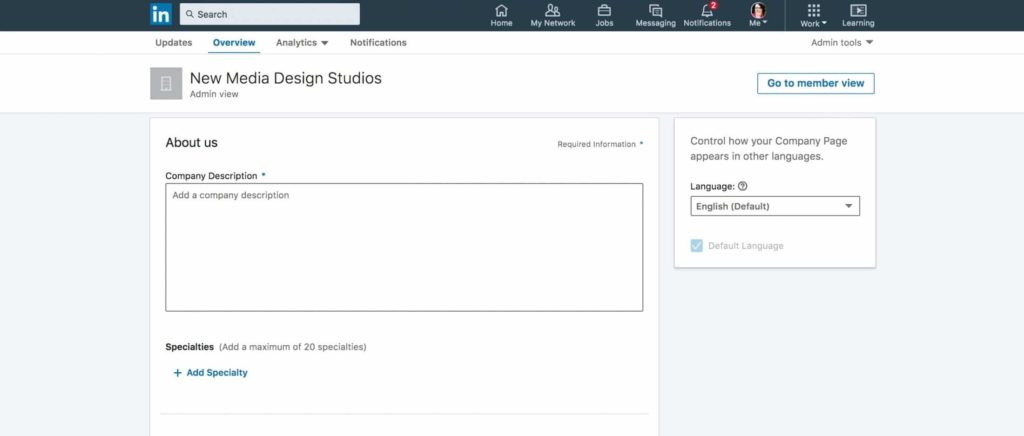
Next, it is time to tell what your company is all about. This is a critical part of your business page and will help people identify how you can serve them, if your company is a good place for them to work, and more.
While you can write up to 2,000 words in this section, longer may not always be better. Ask yourself:
- What are the main goals of my company page?
- Who am I primarily trying to reach (job seekers, employees, prospective clients, etc.)
- What are the key benefits that I provide?
- How can I set myself apart as a company?
Take your time on this part. If possible, get the input from a couple of other people within your company. At a minimum, enlist someone to proofread it for any errors.
After your about section is complete, you will also want to choose your specialties. You can choose up to 20, but remember quality is more important than quantity on LinkedIn. Choose those that reflect a true area of specialty for your business. You can change or update these later on as your business changes and grows.
Step 5: Add Company Details
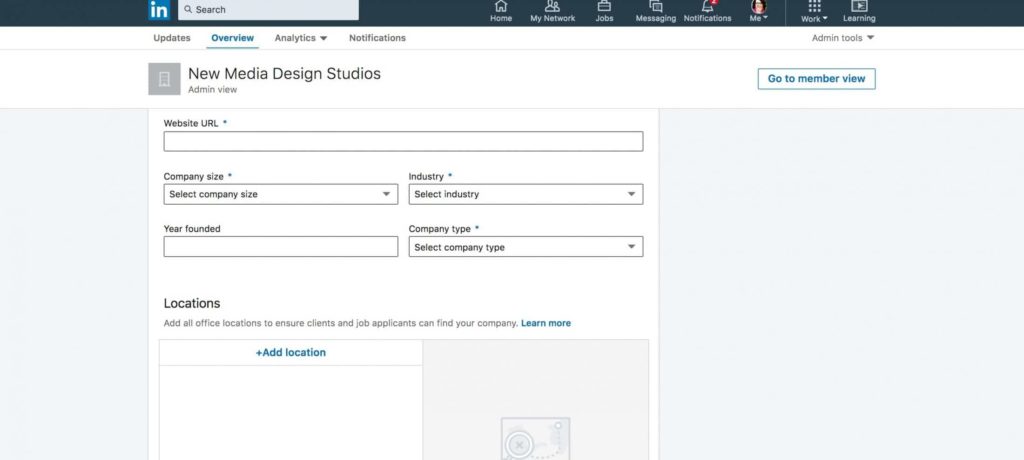
Now it is time to add some specific details to your LinkedIn company page. These include:
- Website address
- Company size
- Industry
- Year founded
- Company type
- Location
If you have multiple offices you can set one as the main office when you add it.
Step 6: Connect Your Groups
The final part of the setup section is to connect groups that you want to highlight. These can be groups that you own and run, but they don’t have to be. Feel free to add any high-quality groups that are relevant to your targeted audience on your LinkedIn company page.
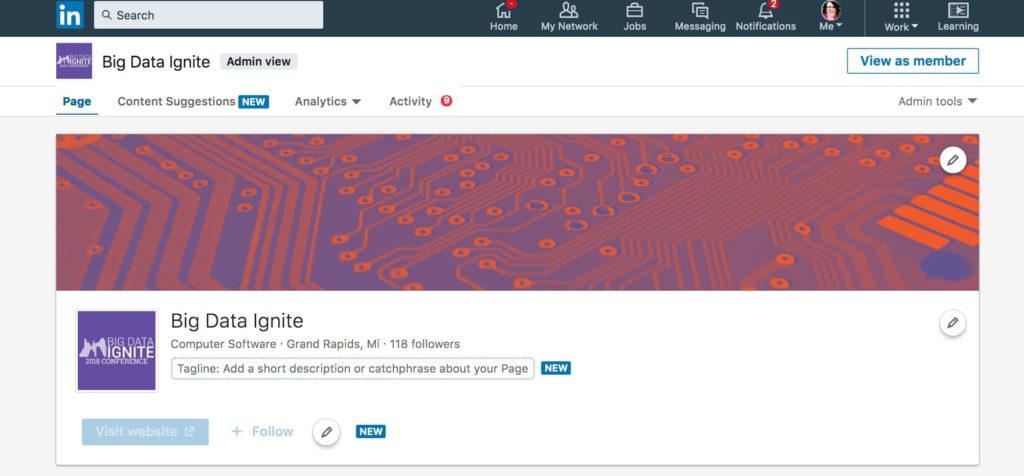
Step 7: Add Your Tagline and Call to Action
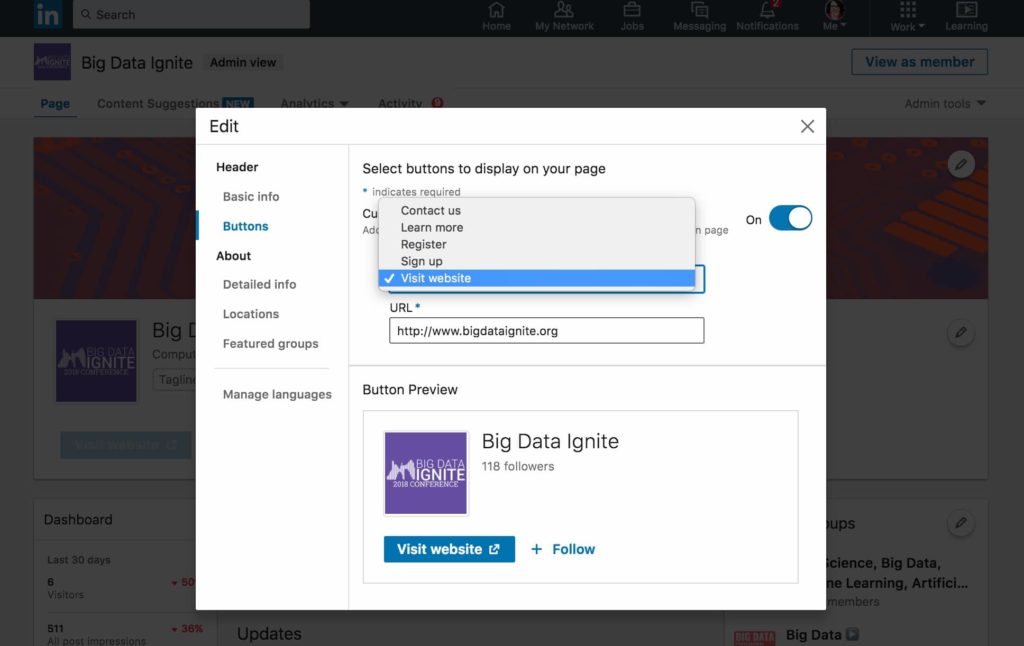
Once your page is published, you will be able to add additional options to your page. You can add a tagline, as well as set a call to action for your page.
You can choose from:
- Contact us
- Learn more
- Register
- Sign up
- Visit website
Regardless of which option you choose, enter the URL that you want visitors to go to when they click on the call to action. This is a good opportunity to direct them to a landing page to direct them into a conversion funnel.
Step 8: Create Content
The final step is to start creating content by creating your first post. You can choose video, image, or text. If you have a short video about your company, this would be a great place to post it.
It is important to remember that updating your content on your LinkedIn company page on a regular basis will be important in order to help your page grow. If you need help with content ideas, LinkedIn now has a tool for that by providing content suggestions by industry.
While you can share directly from this section onto LinkedIn, it is important that you are creating content on a regular basis, and the best way to make sure you are doing that successfully is to plan and schedule your posts using a tool like Agorapulse.
Additional Paid Features
While you can create a LinkedIn company page without a paid account, there are additional features available that you can buy, called “Career Pages.”
One of these advanced features is a jobs page where you can list company openings. Another is the company life page where employees can share what it is actually like to work for your company.
Sign up now for a FREE demo.


