Is it time to delete your Facebook group? Groups can be a valuable asset to your business marketing, but they don’t always work out the way you planned.
If you have a large membership for your Facebook group, it can be extremely time-consuming. Unless they are contributing to a specific business goal, it’s hard to justify keeping them alive.
In this post, we’ll look at how to delete a Facebook group as well as some alternatives to pulling the plug. And if you need to brush up on your Facebook skills, download a free Facebook 101 ebook for a deep look at the essentials.
Deleting your Facebook group is drastic and final. Once you’ve done it, there’s no going back.
You’ll lose all the content and threads. All the work you put in will be gone for good.
So before you delete, consider the other options.
Related Post: How to Remove a Page from the Facebook Business Manager
Change the Group’s Name and Branding
Instead of deleting could re-branding the group work?
It can be disheartening when you grow an engaged group but members constantly recommend your competitors in their comments. Usually, this is because you didn’t make it clear that the group is owned by your business when you set it up.
If so, a re-brand could fix the problem. Change the group name, add branding to your cover images, and link it to your Facebook page.
Here’s how.
Change the group name
- Click the three dots underneath your cover photo.
- Select “Edit group settings” from the drop-down menu.
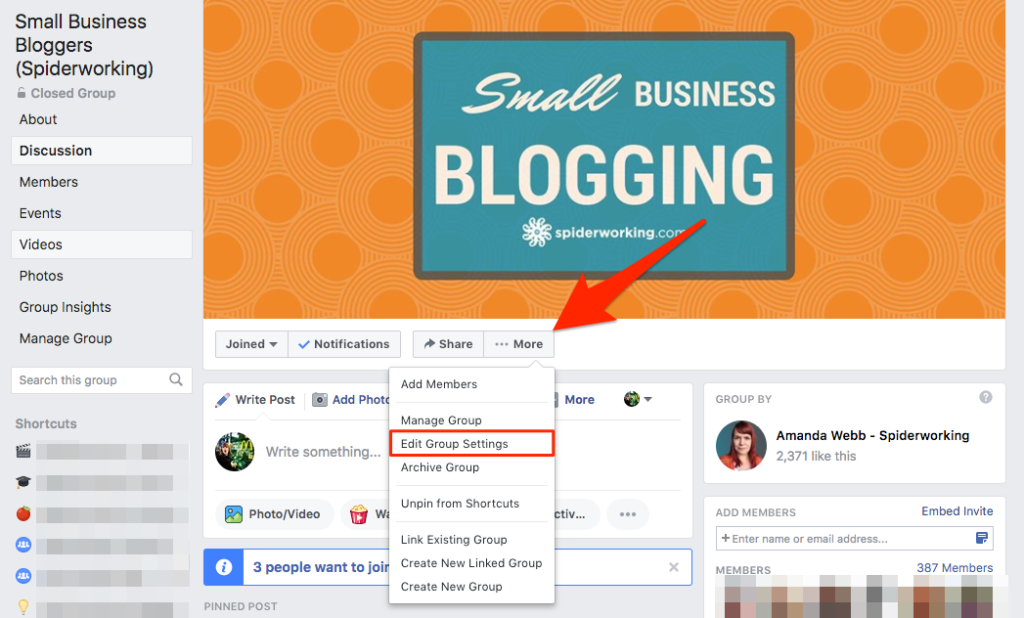
Edit group settings to change the name of your Facebook group
- Type in your new group name next to “Group Name.”
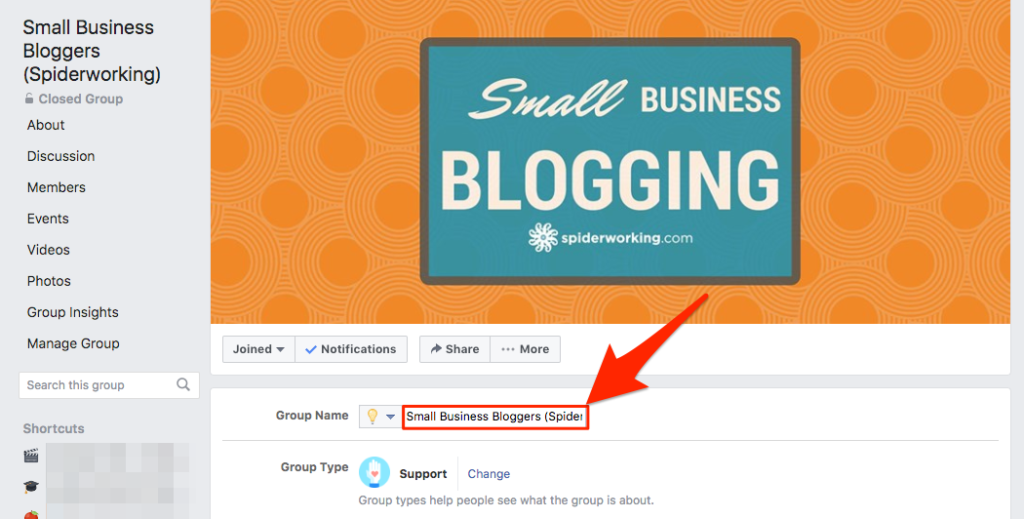
Change your Facebook group name to the new branded version.
Add branding to the cover photo
Use Canva, or your preferred graphic design tool, to create a Facebook group cover that includes your logo.
Link the group to your page
Linking your page to your group lets you post, like, and comment as your page on your Facebook group.
To link your group to your Facebook page:
- Click the three dots under your cover photo.
- Select “Edit group settings” from the drop-down menu.
- Under Linked Pages, click “Link Your Page.”

Link your group to your Facebook page so that you can post and comment as your business
- Click “Link” next to the page you want to link.
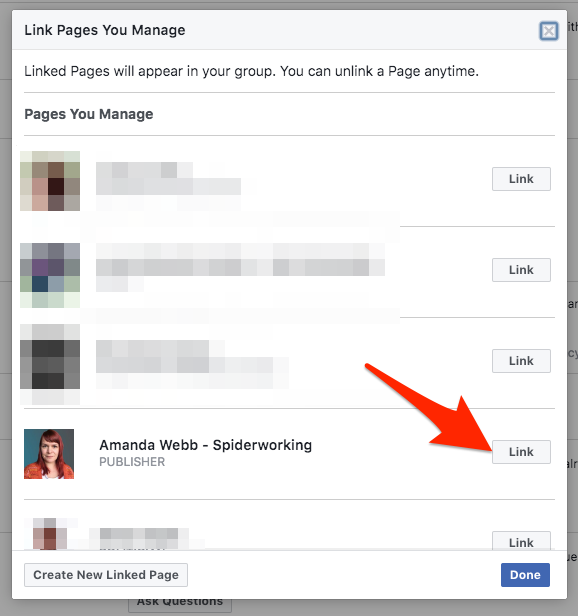
Select the page you want to link your group to
Appoint New Admins
Friendships form in groups—members make real connections and support each other. Deleting the group and destroying these relationships can end in hurt feelings and damage your reputation.
Instead of deleting, offer to hand your Facebook group over to new Admins. Look for active members in the group who might want to take on the role.
If you hand the group over to new admins, disconnect the group from your business and consider renaming it, so that members can see there has been a change.
I also recommend pinning a post to the group explaining the handover and welcoming new admins.
To assign new admins
- Click on the “Members” tab.
- Click on the three dots next to the member you want to give admin rights to.
- Select “Make admin” from the drop-down menu.
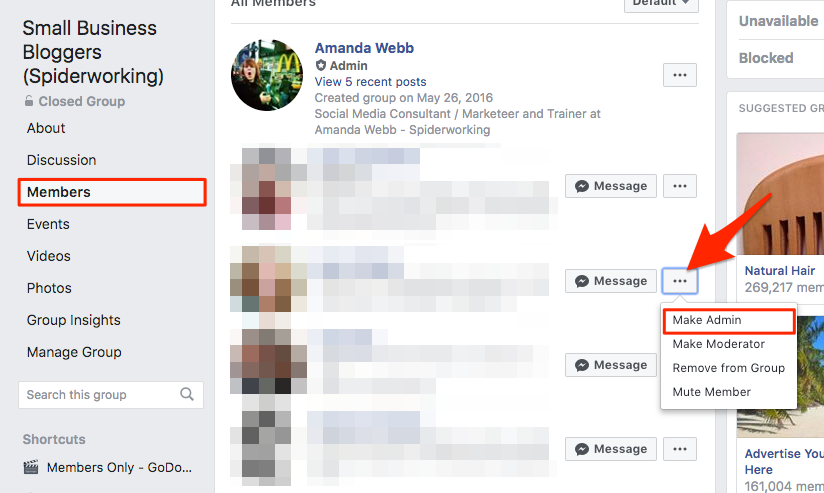
Hand your group over to new admins
Archive Your Group
Only a group creator can delete a group unless the creator has left. In that case, any admin can delete the group. The process is irreversible—archiving a group is not.
Archived groups remain in-tact with all photos and threads still visible for members to read. An archived group will not appear in search results for non-members and no new members can join.
Admins can still block and delete people and threads but the group descriptions cannot be changed.
Archiving is reversible. If you change your mind you can un-archive a group and return to active use.
This could be the best solution if you are taking an extended break from your business or are working on a project that means you don’t have time to give to the group.
It also means you will continue to have access to the content and threads in the group that could be a resource in the future.
How to archive a group
- Click the three dots under your cover image.
- Select “Archive group” from the drop-down menu.
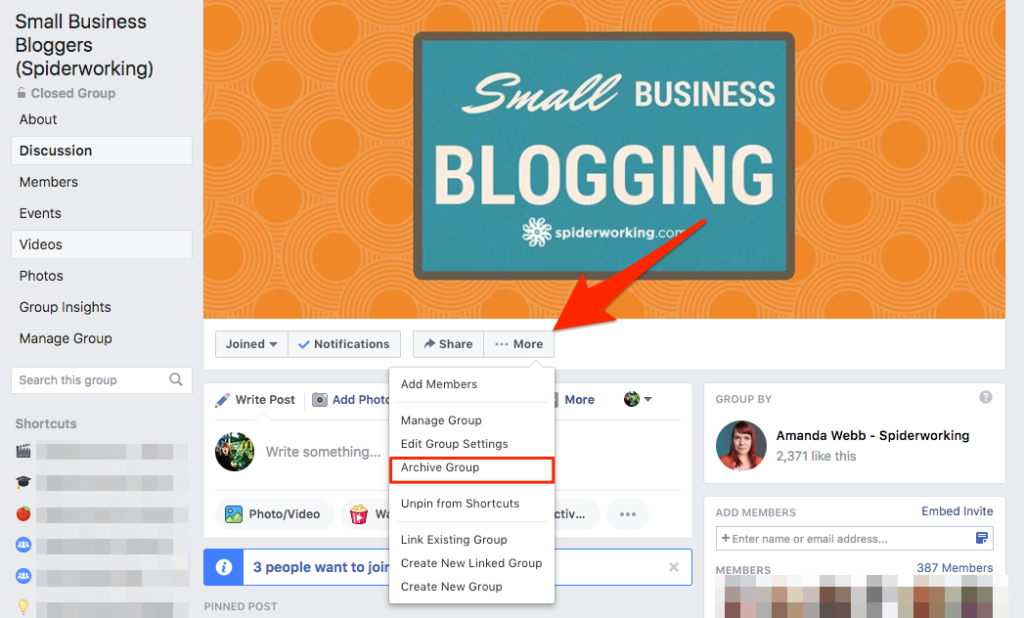
Archive your Facebook group by clicking the three dots under your cover image and selecting ‘Archive group’
- A pop-up window will appear asking you to confirm the action.
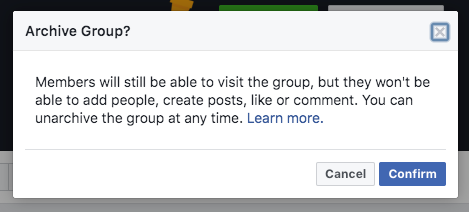
Confirm that you want to Archive your group
Delete Your Facebook Group
If none of the options above work for you then yes, deleting your Facebook group might be the right choice. Deleting a group is permanent. You’ll lose all the content and threads—there is no going back.
Before you hit delete
Tell your members. Your group members have contributed and helped the group grow. They’ve built connections and relationships. It’s courteous to let them know you are deleting it.
This gives them a chance to download any images or videos they’ve posted, note any valuable information shared, and become Facebook friends with the people they’ve connected with.
Give members plenty of time to prepare—tell them when you’ll delete the group and suggest other groups they could join.
The hardest part about deleting a group is that, at the time of writing, there is no way to archive all the data from your group like you can as a page. That’s why it’s so important to take the time to go through your group content and download any images and videos you want to keep.
How to delete your Facebook group
This is a time-consuming process if you have a lot of members.
Only the group creator can delete a Facebook group unless they have left the group.
- Click on the members’ tab.
- Click the three dots next to each member in turn.
- Select “Remove from Group” one at a time until all members are gone.
- The Facebook group is deleted once the last member is removed.
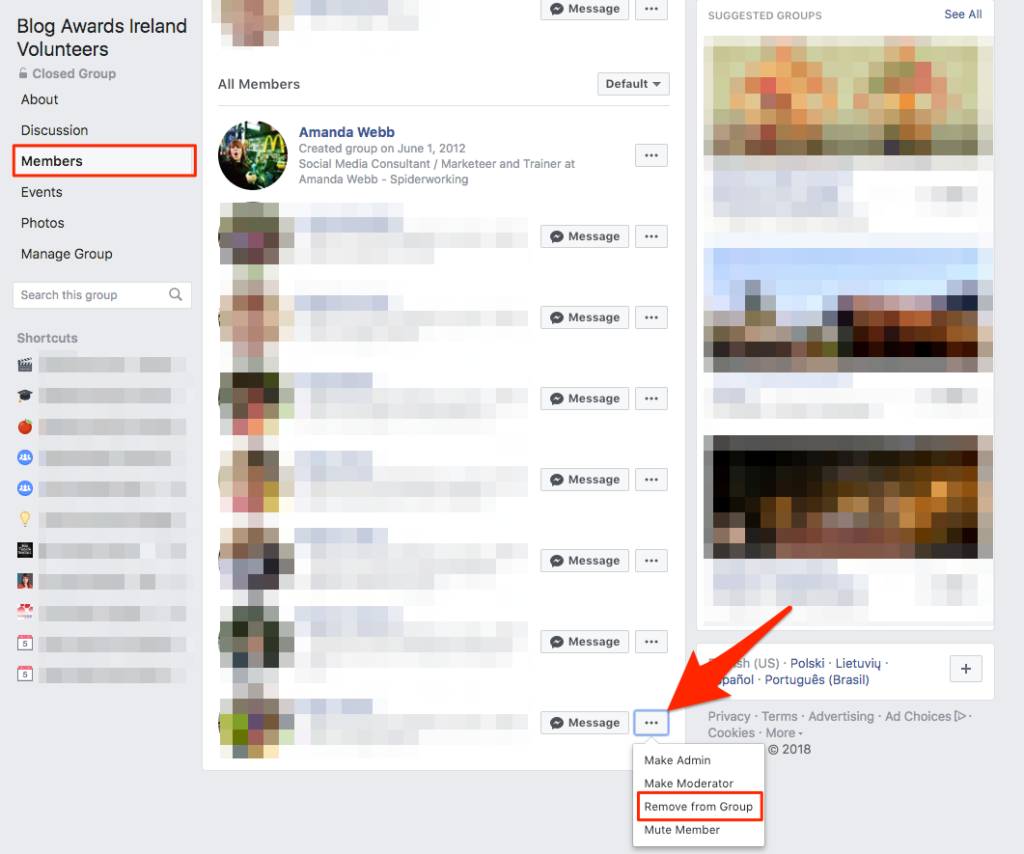
Remove members one at a time to delete your Facebook group
- Facebook will ask you to confirm this as you delete yourself as the last member.
In Conclusion
Deleting your Facebook group is a drastic decision but it could be the right one for your business.
Weigh up your options before you take it.
And if deletion is the best option for you, make a note of what you discovered from running your group so you can learn from it.
Get started on saving time and energy on your own social media management!
Check out our free trial of Agorapulse to help you schedule, track, and measure all your social media efforts.v


