Does getting a verified Facebook page seem out of your reach? It shouldn’t. The process of getting verified is quite simple with these tips.
Have you been thinking about going through the process to verify your Facebook page? The difference on the surface between a verified Facebook page and an unverified Facebook page is a simple blue or gray checkmark. It is so small that unless you are looking for it, you may not even notice it.
What difference does that checkmark make, and how do you get it in the first place?
The verified checkmark makes a huge difference! The good news is that it is a relatively simple process—and totally worth it.
Who Can Verify Their Facebook Page?
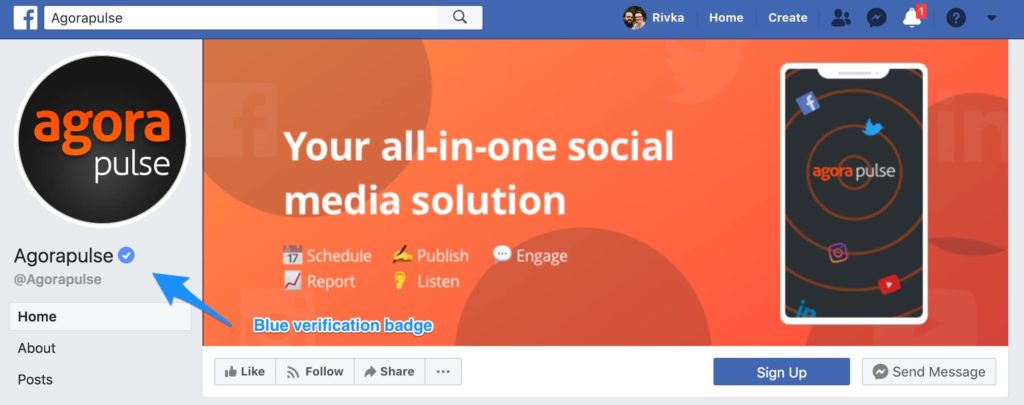
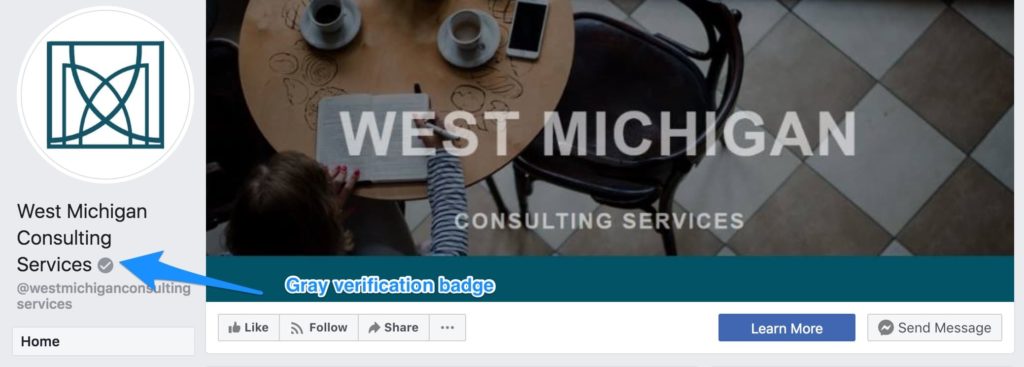
You may have noticed that Facebook now has both a blue checkmark symbol and a gray one. Anyone can meet the criteria for a gray verification badge for their business page if they follow the correct steps.
Blue verification badges are given to both personal profiles and business pages, but not all accounts are eligible for them.
Both colors indicate that Facebook has verified it is an authentic page.
To get the blue verification badge, Facebook must also determine that the page (or personal account) is of public interest.
“We apply the blue verification badge to eligible brands, media organizations, and public figures,” according to Facebook. “Eligibility for the blue verification badge is based on a variety of factors, such as account completeness, policy compliance, and public interest.”
If that sounds a little vague, that is because it is.
Facebook uses its discretion heavily here. If you think you should get a blue badge specifically, you can request it through Facebook’s specific form. Even if you only qualify for the gray verification badge, it is still a good idea to go through the process to verify your page.
Why Facebook Verification Matters
The most important reason to verify your Facebook page is that you will show up higher in search results. This will help more people find you, and it will avoid confusion with similar brands or people trying to impersonate your brand.
Because Facebook has already reviewed your page, it is more likely to show up in searches on Facebook, meaning that new people are more likely to find your page.
Manage Multiple Facebook Pages Without Going Nuts
But there are other reasons you may want to verify your page:
Build trust with your audience
Having that checkmark symbol gives your fans confidence that you are a legitimate brand that they can have confidence in.
Get back your views
If you are famous or successful enough, you are bound to have copy cats. Sometimes, these can be fans who simply want to show their love.
Other times, they can be more malicious, stealing your content and scamming people in the process. By having your page verified, it helps your following to find the real you and be able to ignore the fakers.
Create branded content
If you have qualified for the blue verification badge, you will automatically have access branded content tool without having to apply separately.
Improve the possibility of increased engagement
Even though there are no conclusive studies of this, the cumulative effect of the above benefits may also lead to more reach and engagement with your brand.
How to Get a Verified Facebook Page in Three Easy Steps
As long as your page is completed, page verification is a simple process that only takes a few minutes and a publicly listed business phone number.
If you don’t have (or want to use) a phone number, you can also submit documentation for your business. Many older articles about this process are much more complicated—ignore them. Facebook has recently streamlined this process to make it super simple.
Step 1. Complete your Page setup
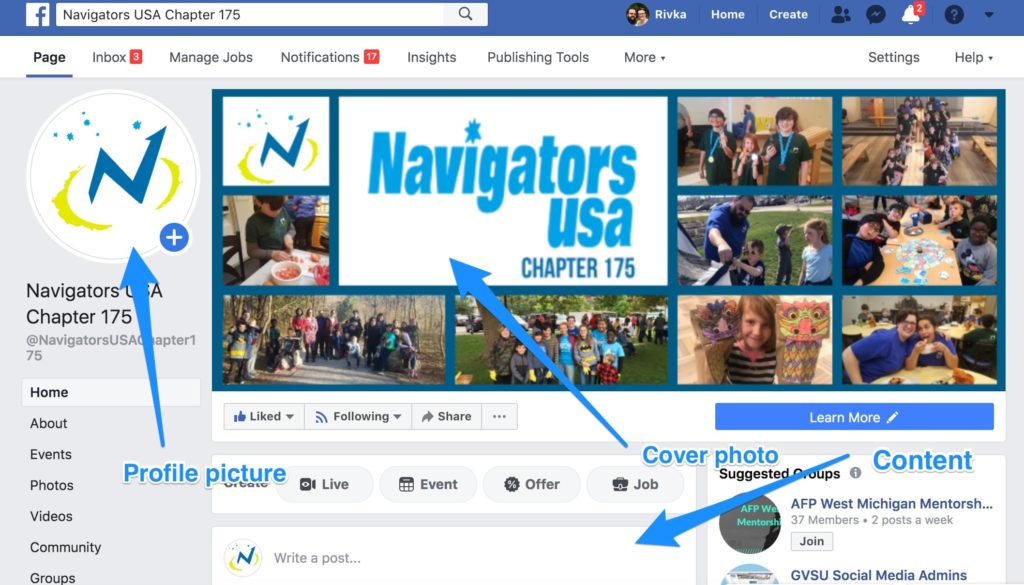
Before you can even officially request your page to be verified, you have to make sure it has some key elements:
- Your page must be published (not in draft mode).
- A Facebook profile picture
- Cover image (or cover video)
- Some content already created and posted
These are the minimum requirements, but the more items on the page you have completed the more likely you are to get approved without a hitch.
Step 2. Find “verification” in your Facebook settings
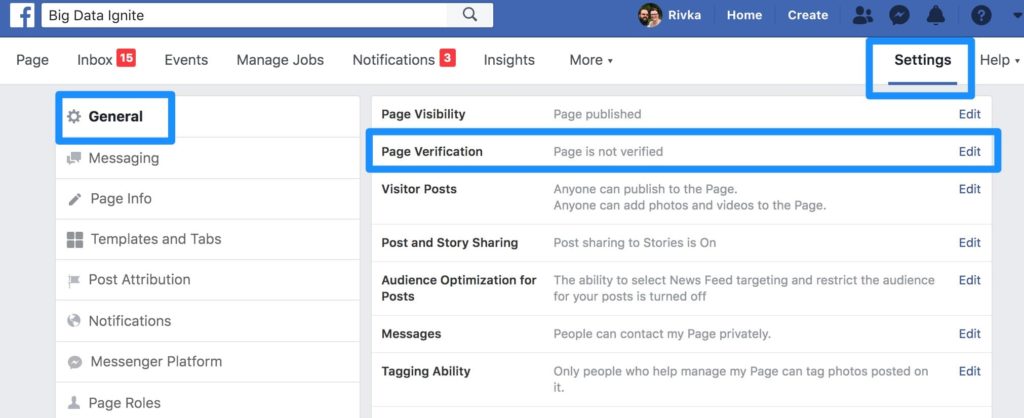
Now you need to go to “Settings” on your Facebook page. You should see the “Page Verification” link the second option from the top under the general settings. Click “edit” and you will be able to verify your page.
Requesting verification from Facebook is the only way to get this badge to show up. If anyone promises you can buy verification from them, it is a scam.
Step 3. Verify by phone number or documents
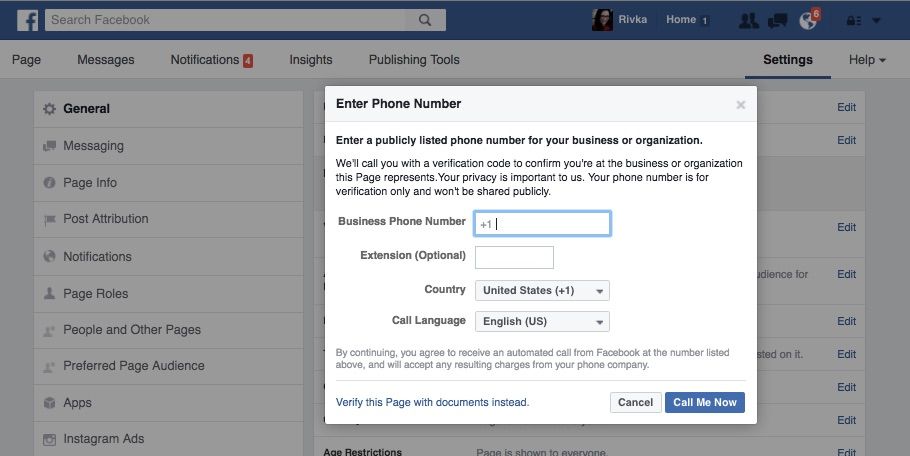
By far, the easiest way to verify your Facebook page will be through your phone number.
Enter your phone number and wait for Facebook to call you. A cheery voice automated voice on the other end of the phone will tell you that they are calling from Facebook and give you a four-digit code to enter.
As long as your number is publicly listed, you should get an instant approval for your page. This also means that if you are an agency or verifying a Facebook page for a client, you will need to input their business phone number and make sure someone is there to pick up and give you the code.
What counts as a publicly listed phone number?
That is unclear.
I verified the page for a real estate agent that I work with using her cell phone number, and it worked fine.
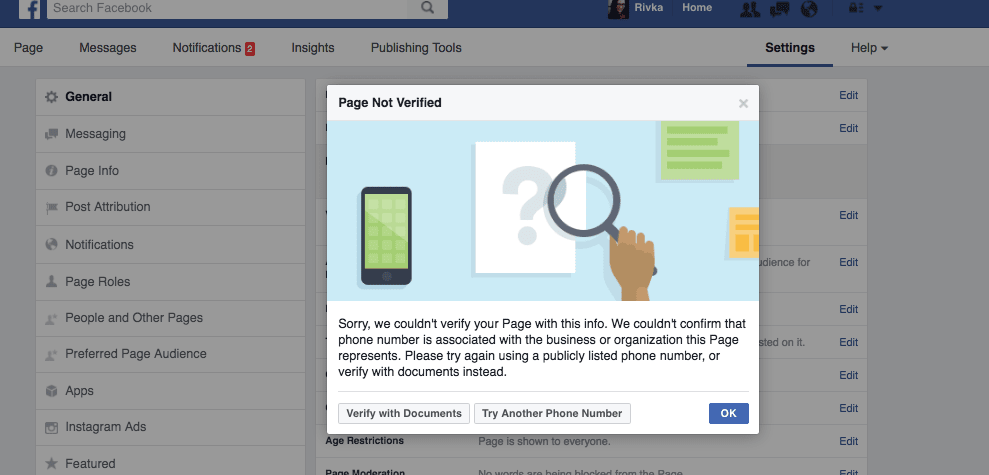
However, another page that I tried to verify with my phone number did not work … even when I entered that information into the “Page Info” section of the Facebook page itself. Most likely, they are searching local phone databases and your business website for the phone number.
This debate is part of an active thread in the Facebook community support.
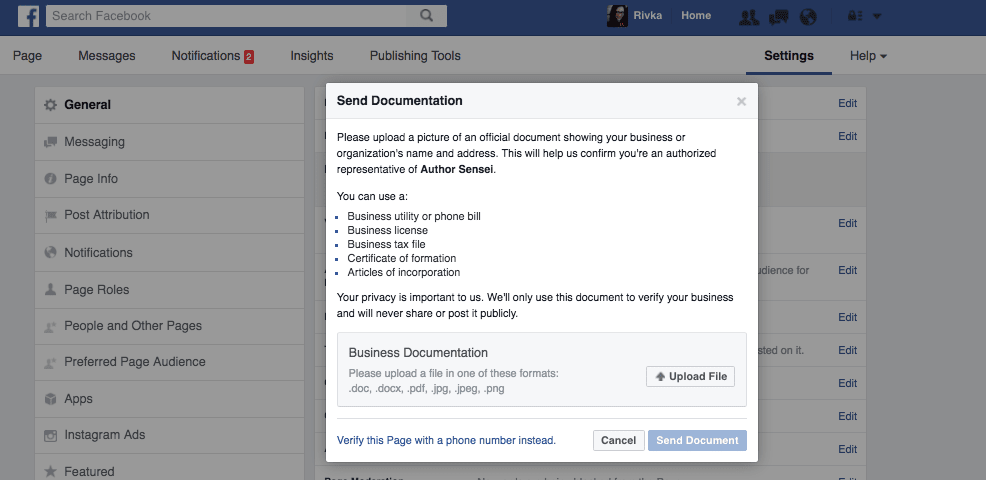
The other option if your phone number doesn’t work is to verify with documents. This is a slightly longer process, and Facebook is specific about what they allow as proof. Documents you can use include:
-
Business utility or phone bill
-
Business license
-
Business tax file
-
Certificate of formation
-
Articles of incorporation
You will need to have this as a digital document so that you can upload it to Facebook.
Once you upload the needed documents, Facebook will manually verify the information submitted to make sure it matches publicly available records. You will get a notification in Facebook itself or an email in a few days letting you know that your page is verified or what additional steps you need to take.
For this method to work, you will want to make sure that your Facebook page business name matches your documentation.
Your Page Is Verified! Now What?
If you are able to complete the phone verification, you will get instant approval of your Facebook page verification, and your checkmark will show up on your page. Welcome to the world of Facebook approved!
Now is the perfect time to announce your new status to the world!
Share a screenshot of your new badge with a message on your Facebook page. Make sure that your Facebook page is linked from your website and the link is working. Double-check that you link to your Facebook page from your email signature. These are all great ways to not only promote your page overall. Now when people click through, they will see that Facebook has verified your authenticity.
Get started on saving time and energy on your own social media management! Check out our free trial of Agorapulse to help you schedule, track, and measure all your social media efforts.
