Facebook’s tracking pixels is a central part in Facebook Ads marketing for many businesses. The conversion pixel tracked user behavior after they click on your ad. The audience tracking pixel tracked user behavior so you could utilize retargeting campaigns.
And now we have a new tracking pixel that combines the two.
Now, the old pixels were rendered obsolete. That’s right: We can only use the new pixel to run our ads. In this post, we’re going to take a look at everything you need to know about the new pixel and the changes, including how to install it.
What Is the New Facebook Conversion Pixel?
Facebook released the new version of the tracking pixel at the very end of 2015, but they only made the change to the new pixel mandatory as of February 15, 2017. Many businesses and marketers haven’t transitioned to the new pixel. Some preferred the old pixel, and others didn’t want the hassle of setting up the new one.
Now it’s time to get everyone on the same page.
You can still access the information from your old pixels, but you can’t use them to track or create ads.
The new pixel combines both the conversion pixel and the audience pixel into one “basic” tool called the “Facebook pixel.” This pixel does everything the old pixels could, including creating dynamic ads. You can utilize advanced matching, custom conversions, and utilize conversion optimization.
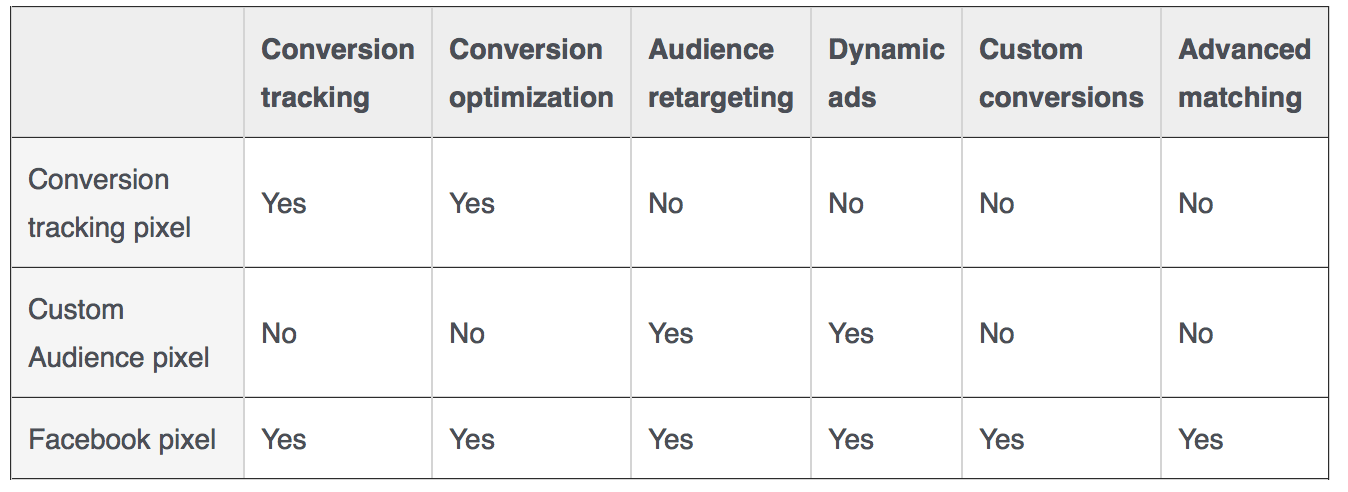
This chart from Facebook shows the combination of features the new Facebook pixel offers.
How Can I Tell if I Have It?
Since Facebook announced the old pixels would no longer work, I’ve gotten hit with a lot of emails from clients asking how they could tell if they had the new or old pixel.
There aren’t a lot of super-simple answers in social media marketing, but fortunately, this is one.
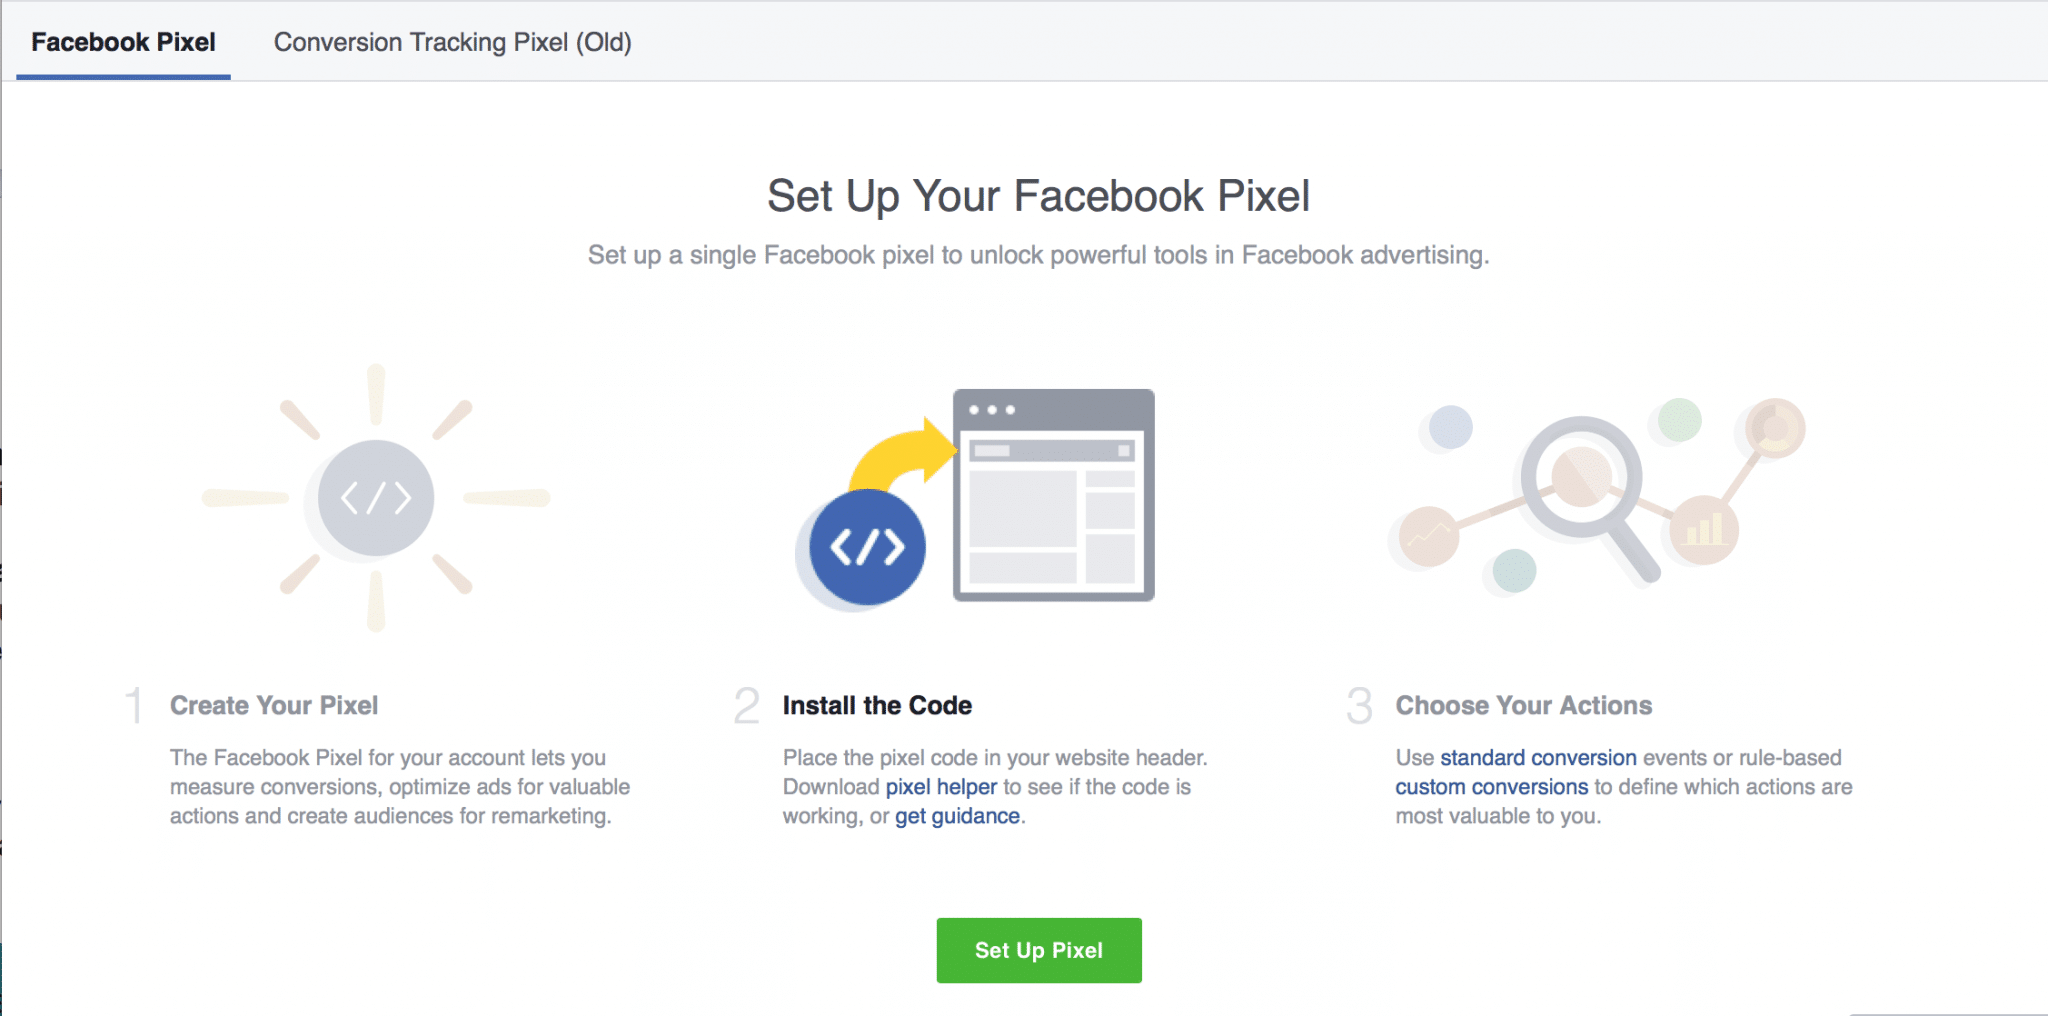
Go to your Ads Manager and navigate to the “Pixels” section under the “Assets” category.
Once you do, you’ll see two different tabs; the first is for the new pixel, and the second is for the old pixels. You can review your old pixels from this screen if you’d like. If you haven’t yet created the new pixel yet, however, you’ll be prompted to do so. Since you’ll only have one pixel per account, if it’s not there for you to view, you haven’t created it yet.
Differences Between the New Pixel and the Old Pixels
The biggest difference is obvious; now you only need to install one pixel on the pages on your site, instead of creating a large number of them. This allows for increased conversion optimization from Facebook.
Now, instead of creating multiple conversion pixels to track different types of conversions, you’ll place Standard Event (or Custom Event) codes on specific webpages. These will allow you to accurately track different types of conversions, like sales, registrations, and more.
Some marketers and businesses have not liked this, and have felt that it’s more difficult to track specific conversions.
Ultimately, the new pixel will offer a variety of benefits to advertisers and businesses, including simplicity of use.
How to Install the New Conversion Pixel
To create your new Facebook pixel, go to your Ads Manager menu and find “Pixels” located under the “Assets” tab. Click on it. On the next screen, click “Create pixel.”
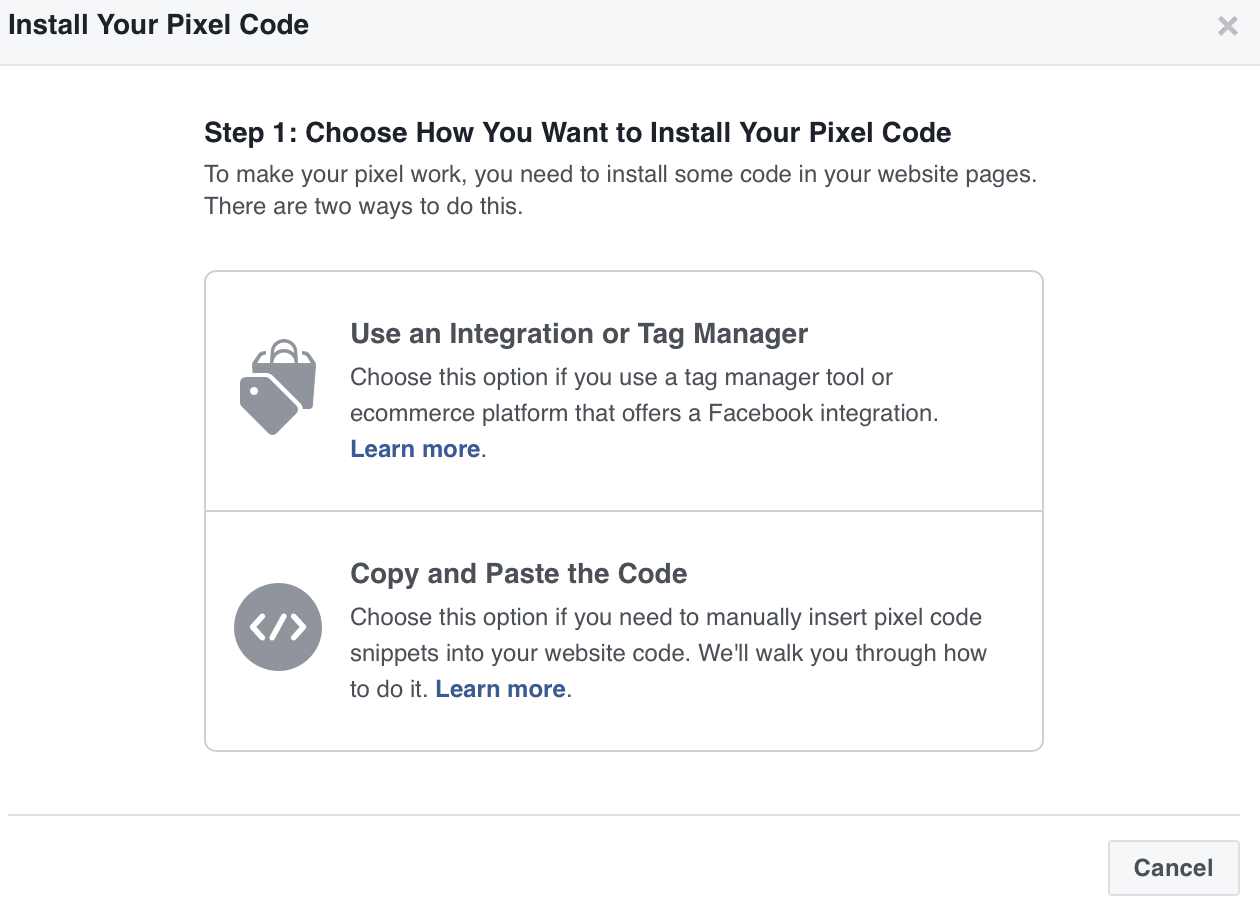
You’ll be asked how you want to install the pixel on your site. You can choose from utilizing an integration or tag manager, or to copy and paste the code manually into your website code. For this example, we’ll copy and paste the snippets of pixel code into your site’s code.
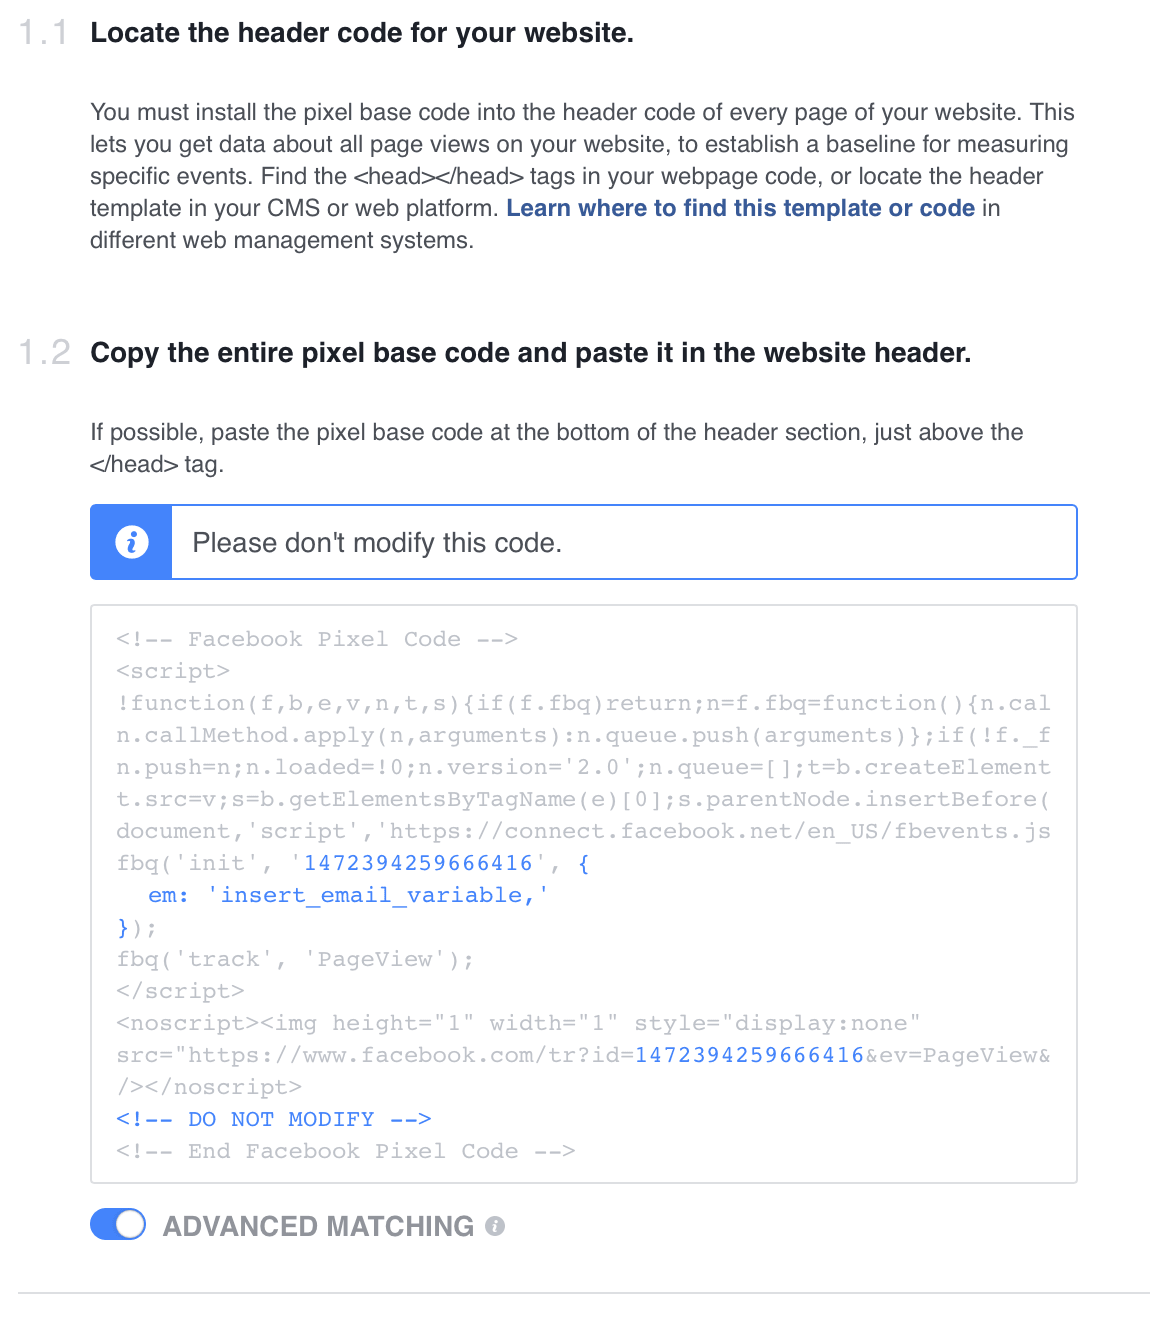
On the next screen, copy the pixel that Facebook gives you.
You’ll then find the header of your site and paste the pixel code directly into it. You can see how to find the header of your site (or utilize integration from third party services) here.
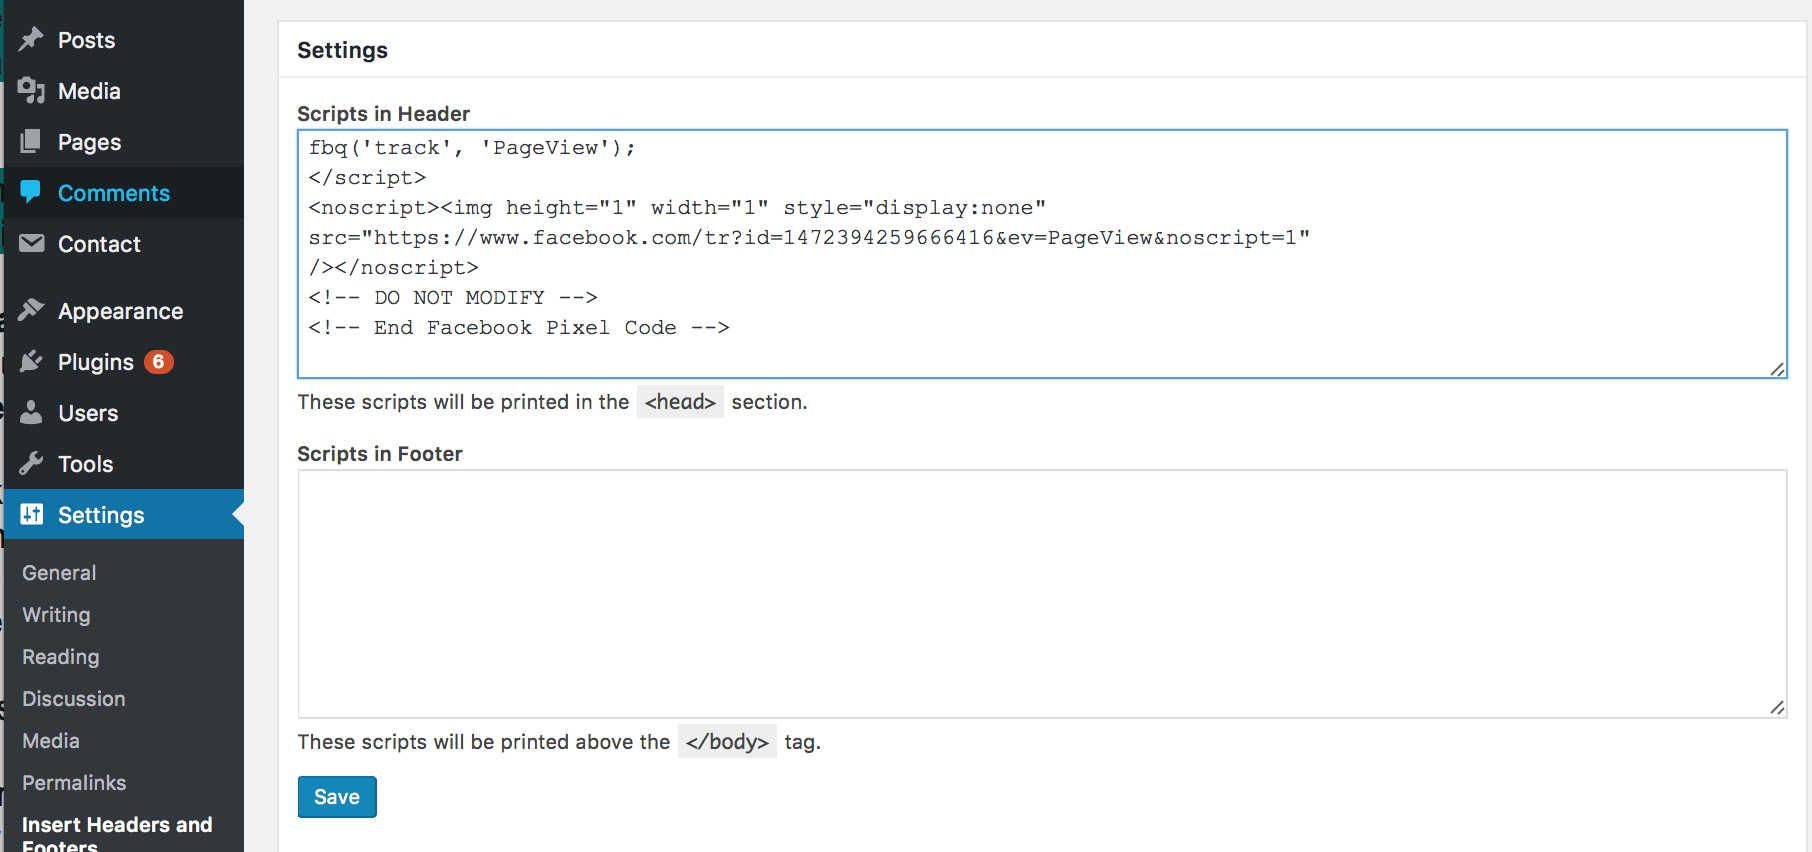
For WordPress sites, there are several plugins that make installation a little easier. You can install the Insert Headers and Footers plugin, for example, find it under Settings, and paste the script directly into the Scripts in Header box. Other WordPress plugins include Facebook Conversion Pixel and Pixel Caffeine; I’ve used both.
Installing Event Codes
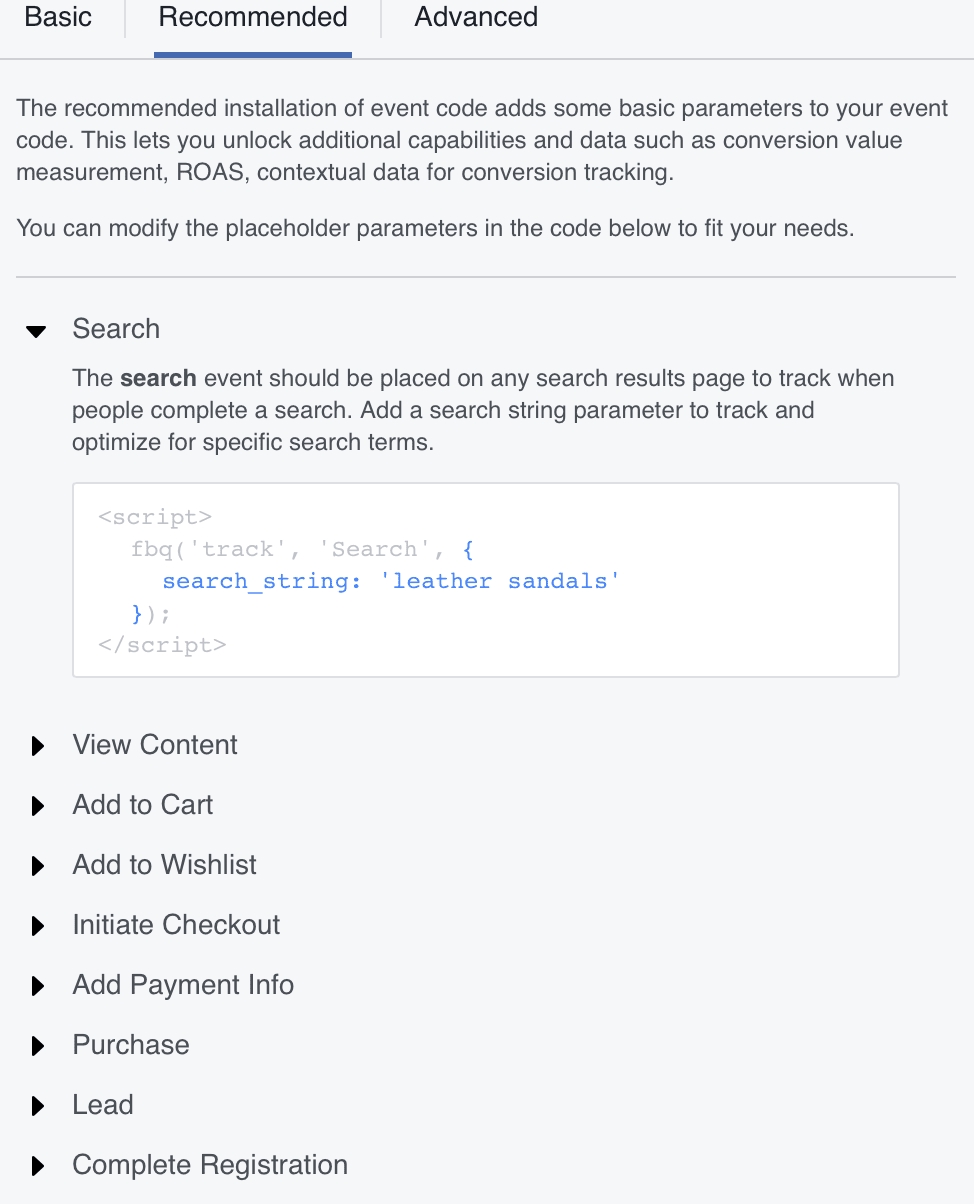
Next, you’ll need to install Event Codes. These will help you track specific events on different pages. Place an “Add to Cart” code on product pages, for example, and a purchase code on your “Thank you for your order!” page.
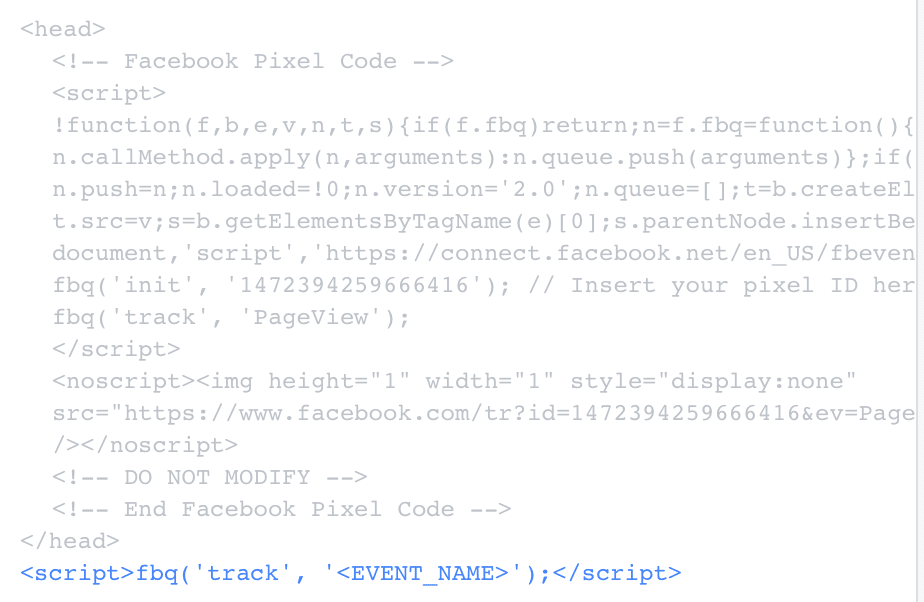
You need to paste these snippets of code outside the <head> tags, as pictured in the example below.
Verifying Your Pixel
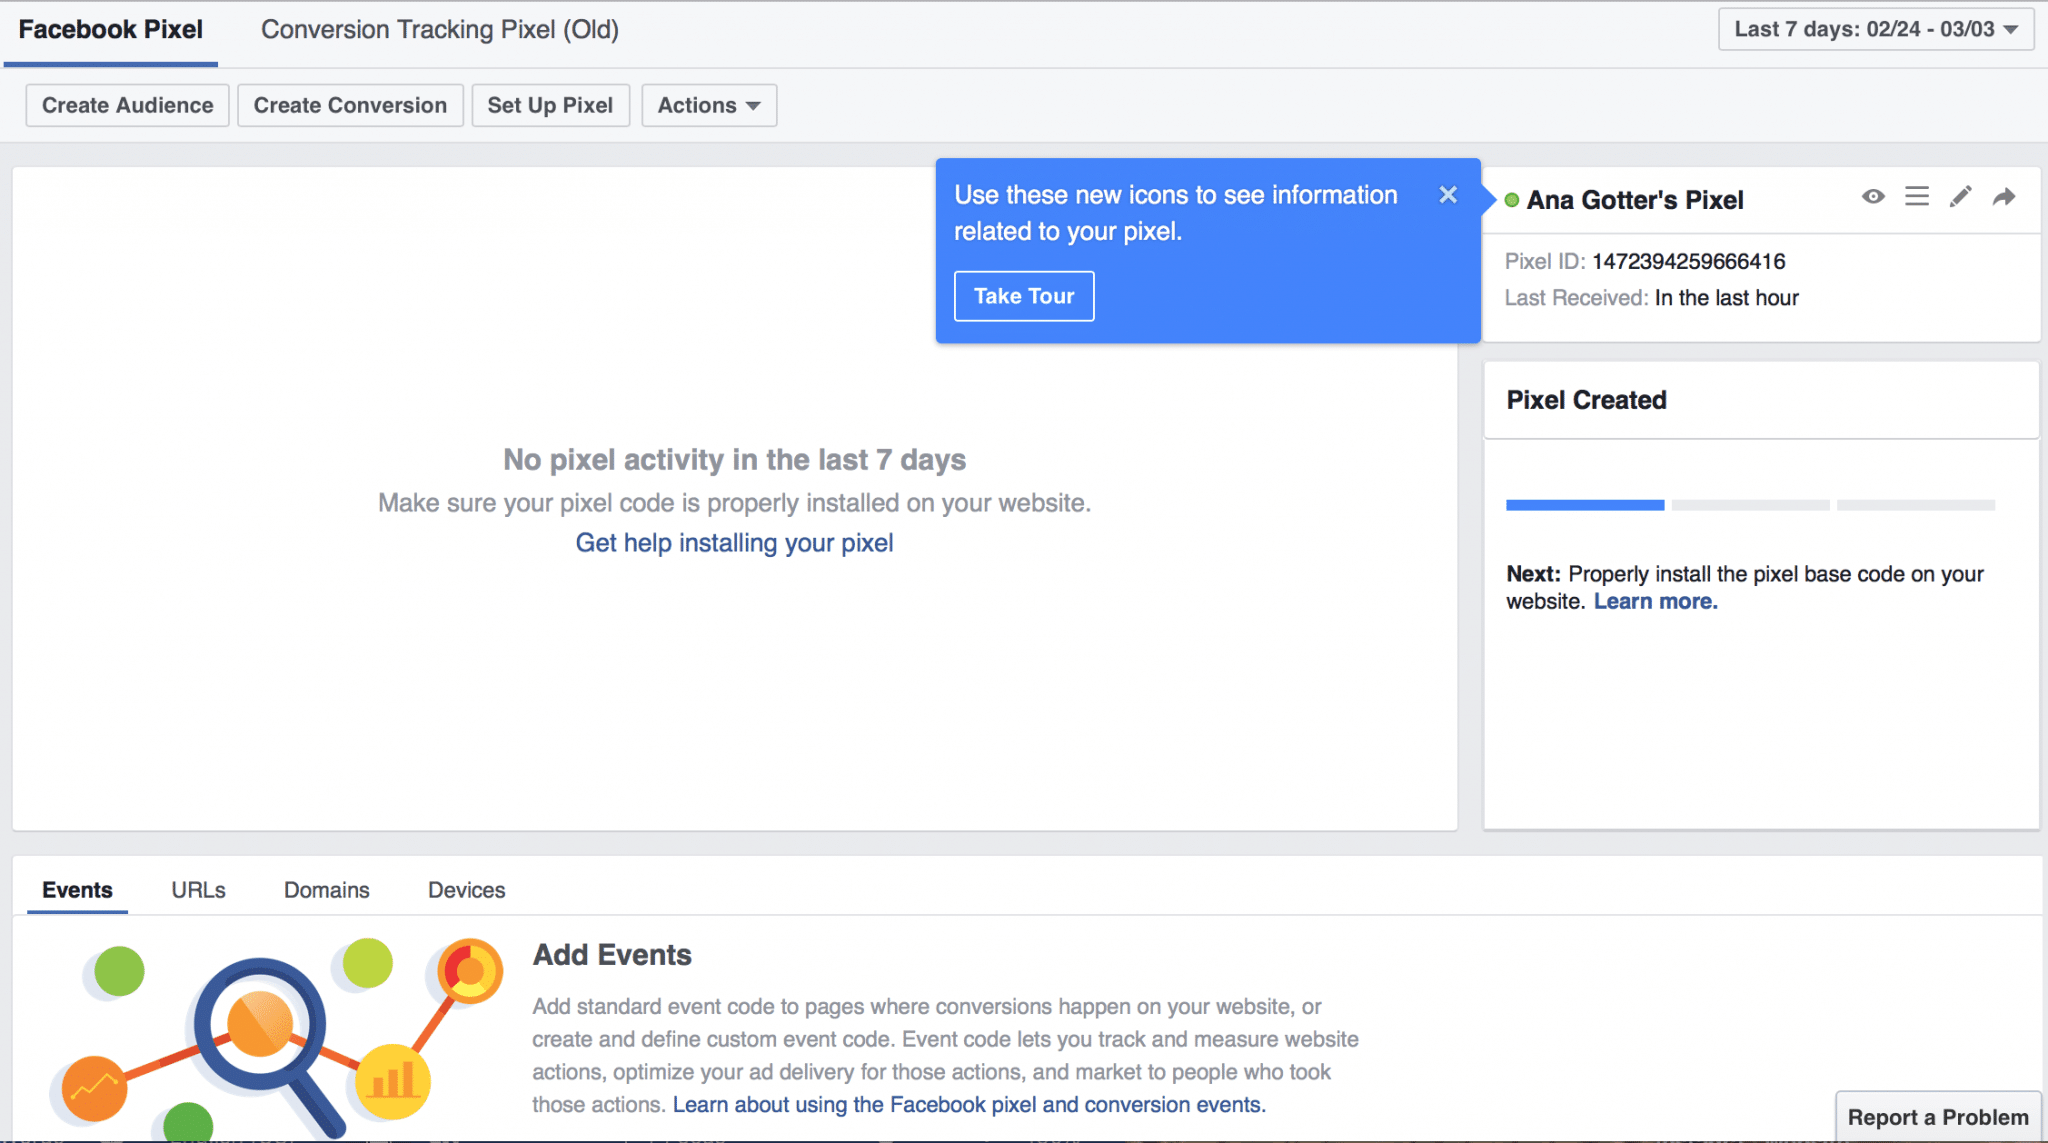
After you do this, you’ll be asked to verify your pixel. To do this, click away from the pixels screen and click back to it. If your screen looks the same as before, something didn’t work; go through the process again. If it did, you’ll see a page for your new pixel.
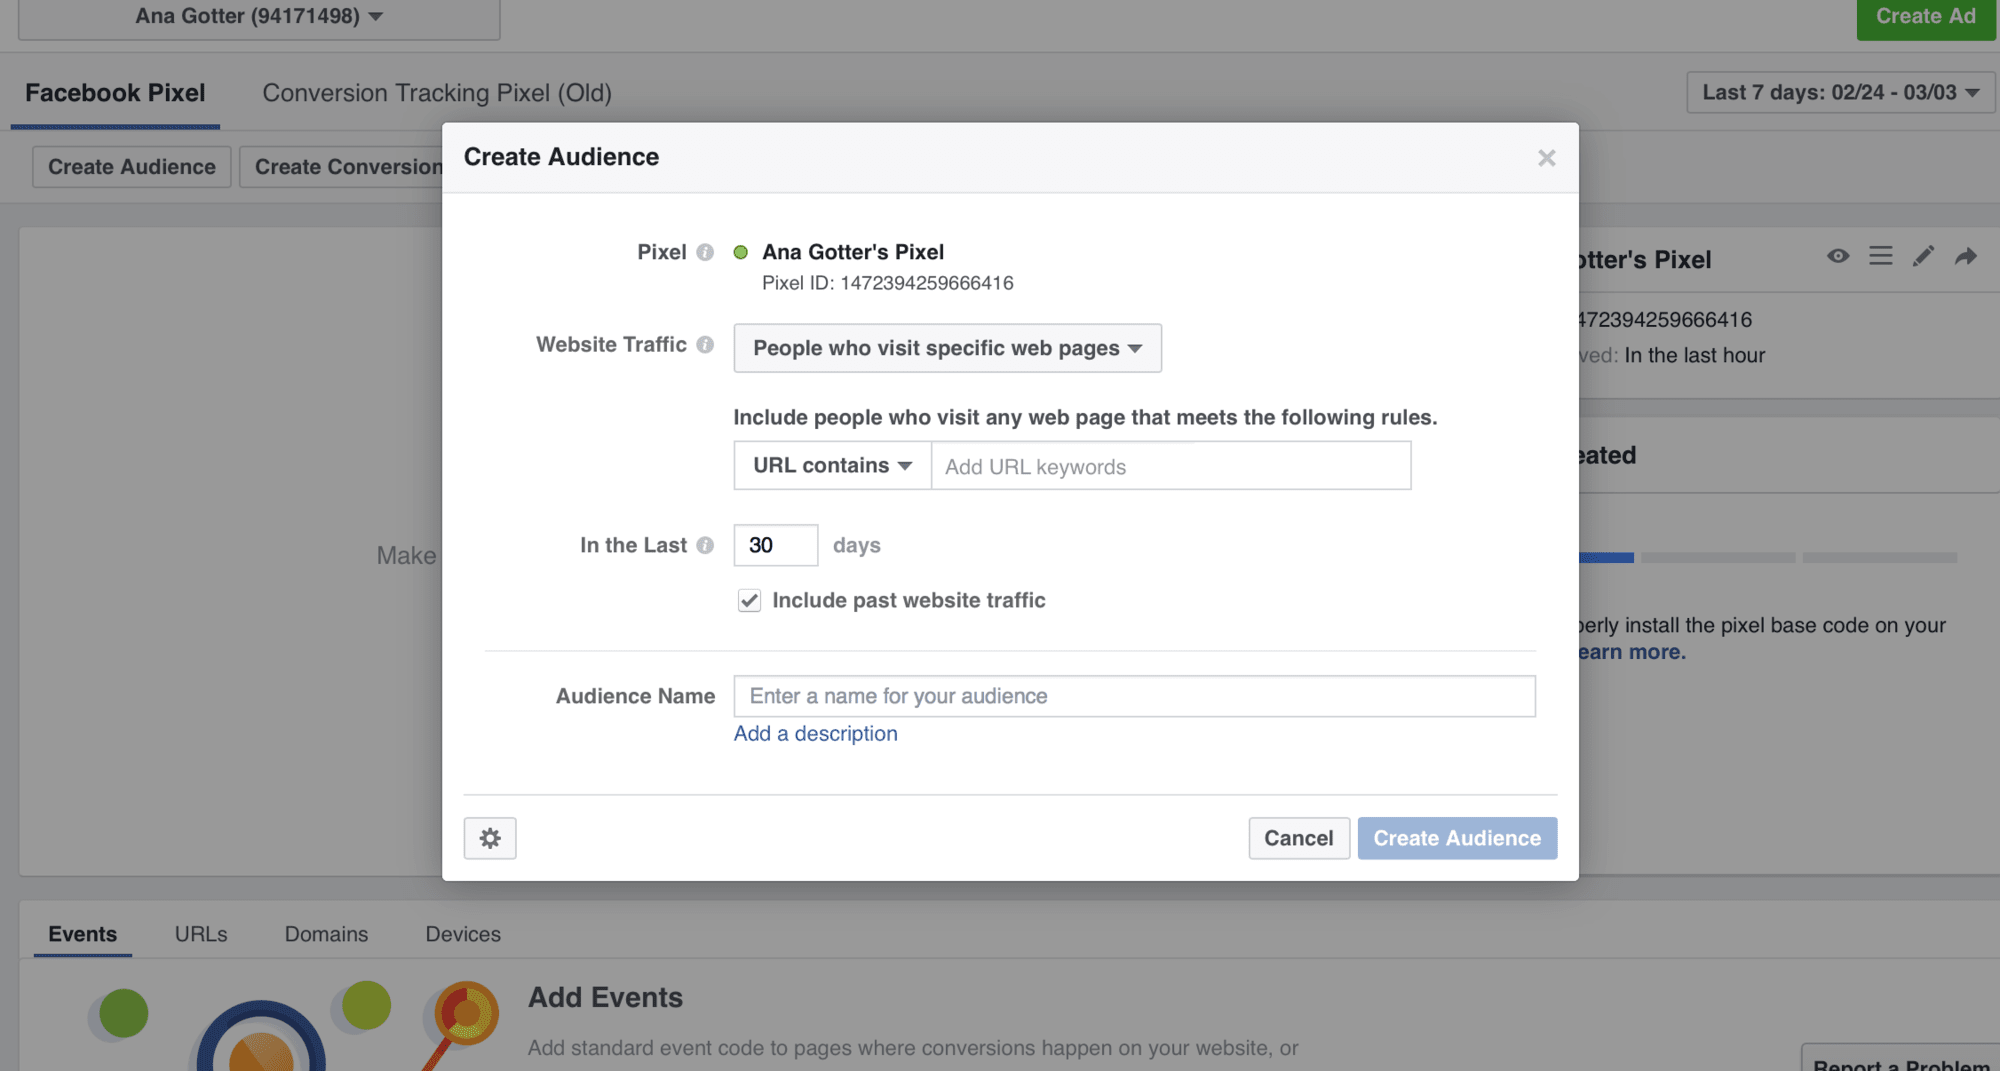
From this screen, you can create custom audiences, track conversions, and get new event codes to add to your pixel.
What if I Use Third Party Ad Services?
Many third party services have been supporting the new Facebook tracking pixel for a while now. Everyone that I contacted said that their platforms utilize the new pixel.
If you’re unsure if your third party service or Facebook partner has fully adapted to the new platform, check the analytics of a new campaign in both Facebook’s Ads Managers and in the third party reports. If there are any discrepancies, contact the service for more support.
Final Thoughts
You may already be using the new Facebook pixel, but even if you aren’t, it’s easy to install. The new pixel is more convenient, with advertisers only having to create and install one pixel instead of having to create separate conversion and audience pixels.
And remember, regardless of the pixel changes and which ad creation service you use, Agorapulse’s dashboard will still catch and collect every single comment on your Facebook Ads for you to monitor and respond to.
What do you think? How do you like the new Facebook conversion pixel? Which pixel did you prefer? Leave us a comment and let us know what you think!


