Have you wanted to start a YouTube channel but don’t know where to start? Here’s your step-by-step guide to creating a new YouTube channel efficiently.
Youtube stats lists are claiming Youtube to be the third most popular platform in the world. No wonder so many businesses are planning to build some visibility there.
Before you create a YouTube channel, ask yourself a couple of questions first to get you on the right course. The first question to ask is why you actually need (or why your client needs) a YouTube channel.
Some people know exactly what they want to achieve and why they need a video outlet for that. They may want to become popular by sharing their traveling experience or family life.
Brands may want their products to be discoverable via YouTube search and suggestions. Bloggers may want to build additional income through YouTube ads. Or you simply want to host your videos somewhere to embed them on your landing page.
All of those are perfectly legit reasons.
The only reason I wouldn’t accept as an answer is: “Because everyone else in my industry is on YouTube.” You see, I’ve seen too many businesses create a blog or a YouTube channel just because their competitors are doing that.
It never ends well. You need a purpose and plan.
- Ask these questions before you start a YouTube channel
- Step 1: Set up your YouTube entity
- Step 2: Fill in your basic details
- Step 3: Add your first YouTube videos
- Step 4: Announce your YouTube channel everywhere
The second question to ask yourself is: “What’s my unique idea?”
The YouTube platform is over-saturated with content at this point. Creating relevant content that will resonate with your audience and contribute something new is getting harder and harder to stand out.
So when starting out you need to have a good understanding of whether there’s anything new you are contributing to the platform. Otherwise, your chances to get noticed are very slim.
Don’t overthink it, though: No need to try and come up with anything extraordinary or innovative. This is a quick way to burn-out.
Ask These Questions Before You Start a YouTube Channel
A better way to approach finding your unique idea is by trying to answer one or several of these questions:
- Which YouTube videos would help me personally in solving my frequent struggles?
- Is there any unique experience or skills my company (or my clients) can share in a video format?
- What would help my customers in answering their daily struggles and what’s the best format for that?
Again, creating a YouTube channel for the sake of creating one is a poor strategy. Envisioning the unique angle of your future channel will help you boost your team’s inspiration and motivation, and it will be much easier to get your YouTube channel off the ground.
Creating a channel just because your competitor has one is a poor strategy. Yet, using channels in competing and neighboring niches is not a bad idea. It is incredible how much you can learn by spying on your competitors, so do try that!
How to Set Up a YouTube Channel
1. Set up your YouTube entity
To start YouTube channel, you will need to first set up your YouTube entity:
- Go to YouTube.com and log in using your Google account. (If you don’t have a Google account, you will need to register one.)
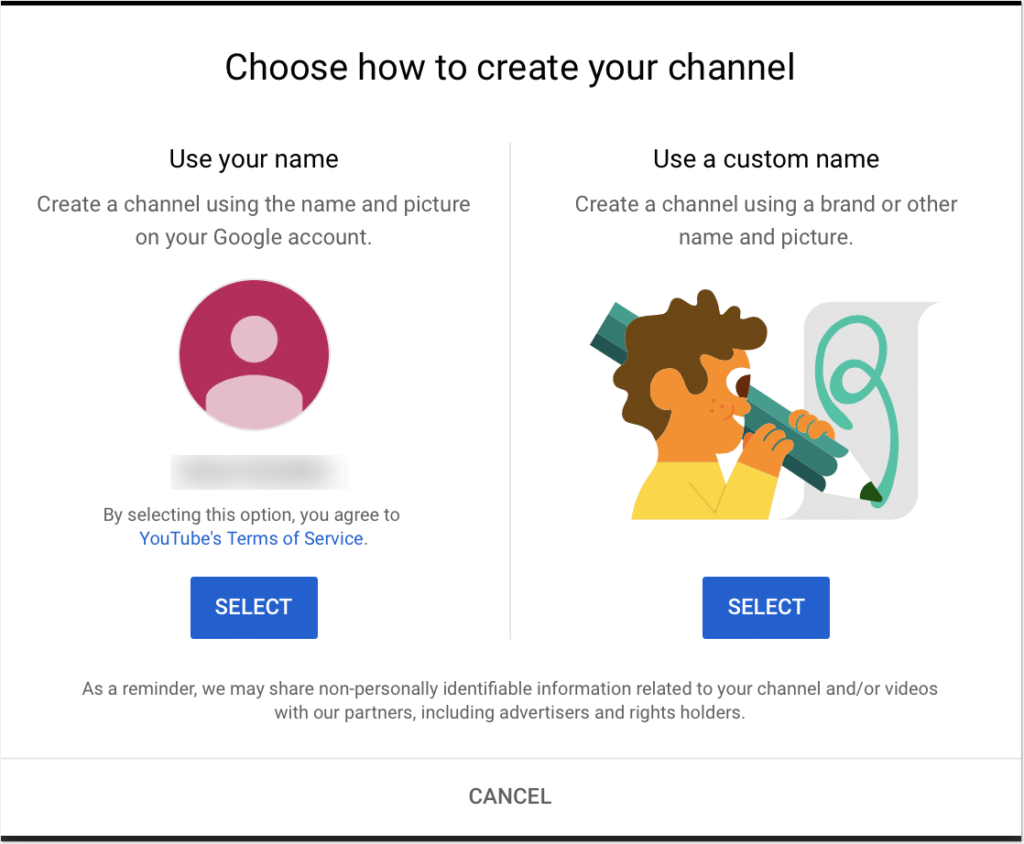
- Once you login, you will b given two options: to use your Google Account name or set up a new name for your channel:
If you choose the latter option (“Use a custom name”), you will be setting up Youtube brand identity. Unlike personal Youtube channels, brands can be managed by several accounts.
You can also manage multiple brands from a single personal account.
Related: YouTube 101: What Every Social Media Manager Needs to Know
2. Fill in your basic details
For the sake of an experiment, I selected the latter option to set everything up from scratch. So:
- Create your channel name. (This will be publicly visible and findable through the platform.) You can use your brand’s name or any other name (depending on your purpose). A good channel name represents your digital identity and your content. Generate a business name that reflects your niche and value proposition (and register a domain for it as well)
- Upload your profile picture. Your YouTube profile picture is linked to your Google Account, so once you set or change it on YouTube, it will show both on your account and channel. Again, you can change it as many times as you want, but it is a good idea to start by setting up a proper recognizable brand identity. You want your channel to be associated with your brand from the very start. It is recommended to use a square or round picture (best dimensions are 800 x 800 pixels). Sadly, no animated GIFs are allowed or supported.
- Add links to your site and social media accounts. You can add one link to your site as well as link your Facebook, Instagram, and Twitter pages.
- Enter your channel description. This is a very important, yet under-utilized step. Text content is still important for search algorithms, so if you want your channel to rank better in Google and YouTube. Take some time to write a detailed search-optimized description.
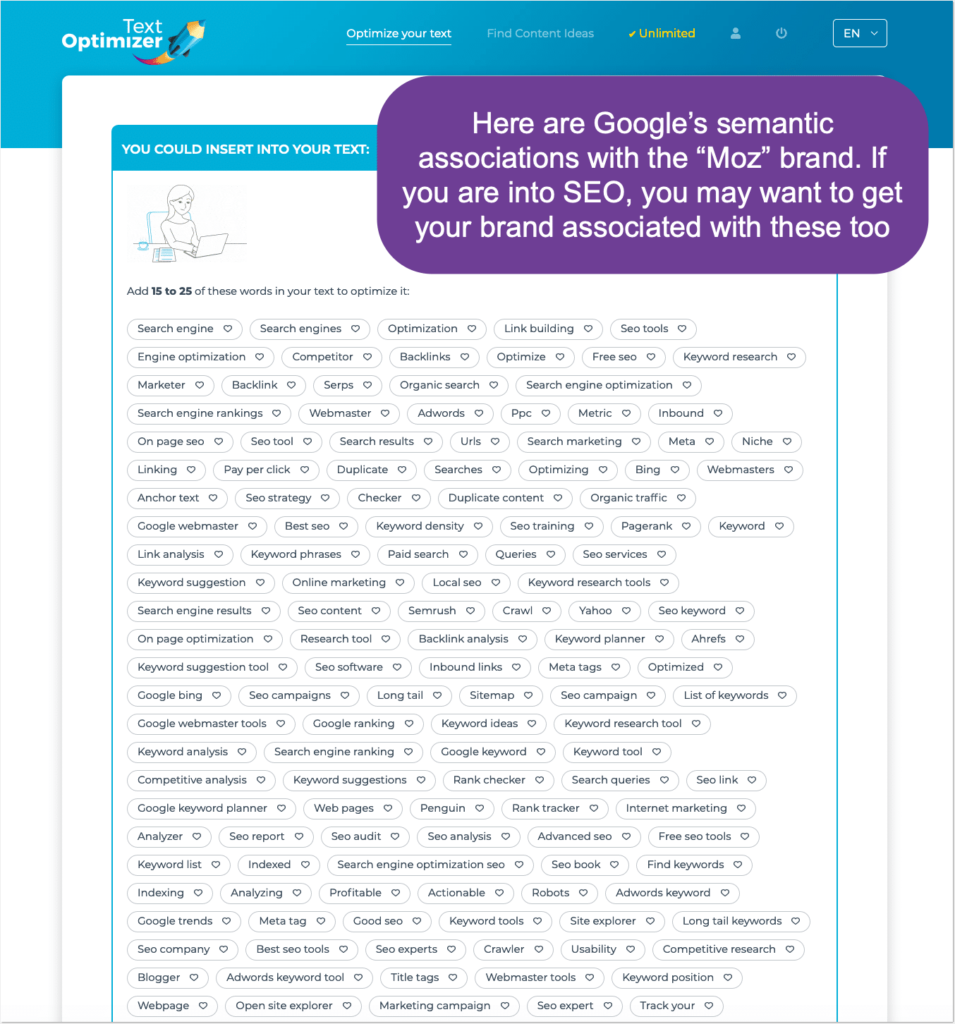
One trick I’ve been using to craft a well-optimized description is running my competitor’s name through a semantic analysis tool called Text Optimizer. The tool runs your keyword through Google and extracts related concepts and terms. Use more of these to match Google’s associations with your new brand identity:
3. Add your first videos
You don’t need dozens of videos at the start, but you need a few before you announce your new channel to your community.
I’d start with at least three videos:
- The channel trailer to be able to customize your channel layout prior to getting people to visit it
- Two videos (or more!) you had planned prior to setting up your channel
For every video you upload, don’t forget to follow basic video search engine optimization steps.
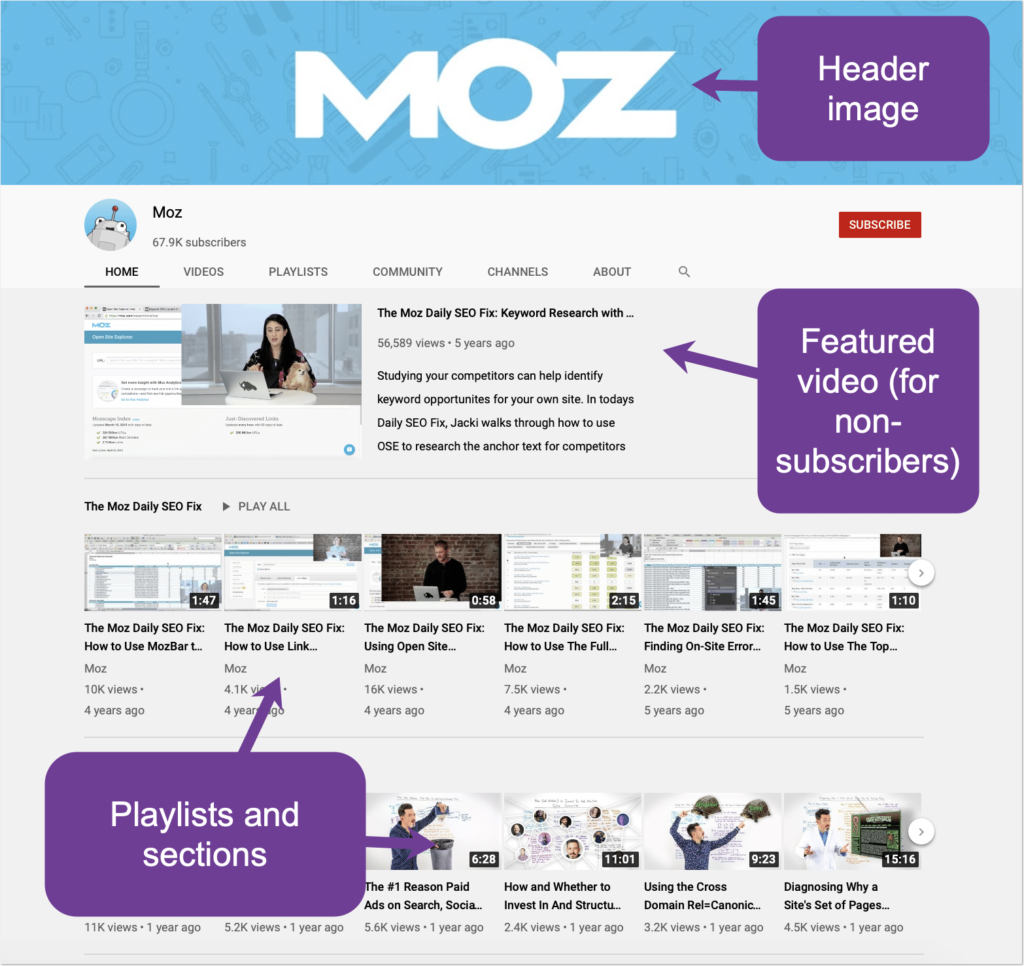
Once your videos are uploaded, go “My channel” -> “Customize channel” -> “Channel settings” and there “Customize the layout of your channel”
- Add a channel trailer.
- If you have it ready, suggest content for your subscribers.
- Upload a channel header image.
- Start organizing your videos into playlists and sections to bring more videos forward.
I always feel like making things look well-branded and organized before I start actively inviting people to check my new channel out.
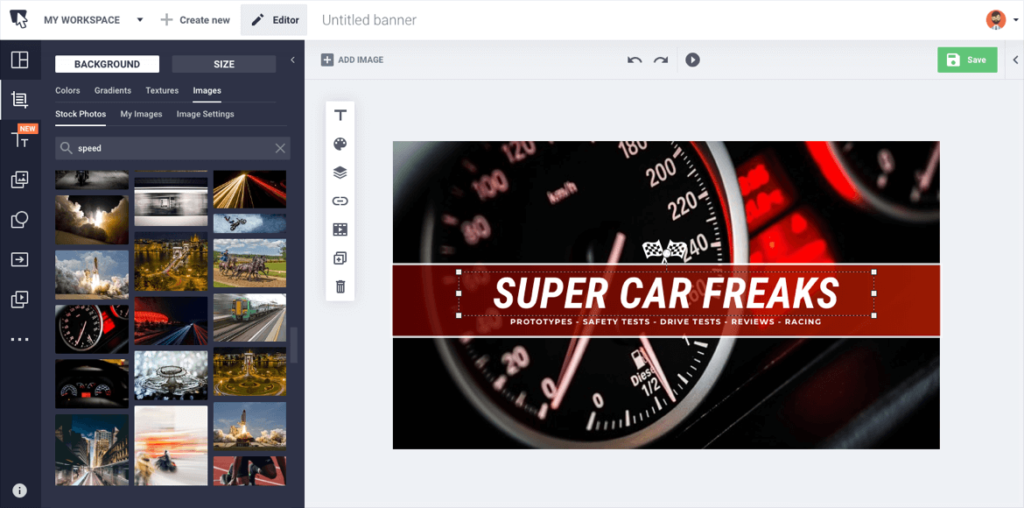
To easily create YouTube’s header image, you can use tools like Snappa, Bannersnack, or any of the alternatives:
4. Announce your YouTube channel everywhere
Now that your channel is created and branded, you may want to invite your initial subscribers:
- Announce your new channel in your email newsletter.
- Link to your channel from your site (including your “About” page).
- Add a “Subscribe” button to your blog.
- Invite your social media followers to subscribe to you on YouTube.
- Utilize your email signature to promote your videos. Knowing how to embed a Youtube video in Gmail is straightforward but under utilized.
- Email your close friends and ask for help announcing your channel.
You can go as creative as you feel like. For example, you can host a Twitter chat getting your customers’ ideas on the best topics to cover in the videos.
As Soon As Your Channel Is More Established
You cannot enable or customize a few features until your channel is a bit more established, so don’t forget to go back and customize these:
| Setting to customize | Min channel age | Required min # of subscribers | Min watch hours | Additional requirements |
| Custom URL | 30 days | 100 | n/a | The channel must have a profile pic and channel art set up |
| YouTube Partner Program (to enable monetization) | n/a | 1000 | 4,000 valid public watch hours in the last 12 months | Have a linked AdSense account. |
In Conclusion
YouTube channel set-up is really the easiest step here. It gets harder and more exciting from there. As you start seeing people and liking your videos, you’ll feel more and more inspired. Tracking where people are discovering my videos from has always been particularly interesting to me. It is always amazing to start something new and get it off the ground. Good luck!
* * *
Sign up now for a FREE demo.

