It’s no surprise that video is a popular format of content on Facebook. It seems that every other post on Facebook is a video and with the launch of Watch, Facebook continues to push video content front and center.
Inflated metrics aside, when it comes to advertising on Facebook, video ads are still one of the most popular ad formats, simply because they work!
Video is so much more engaging than images. It grabs your target audiences’ attention in the Newsfeed and hold on to that attention for longer than a post, leading to greater engagement rates.
To help advertisers use more video content in their ads, Facebook has launched the Video Creation Kit, a new tool that allows you to easily and quickly create image-based videos from within the Ads Manager.
Where Can I Find the Video Creation Kit?
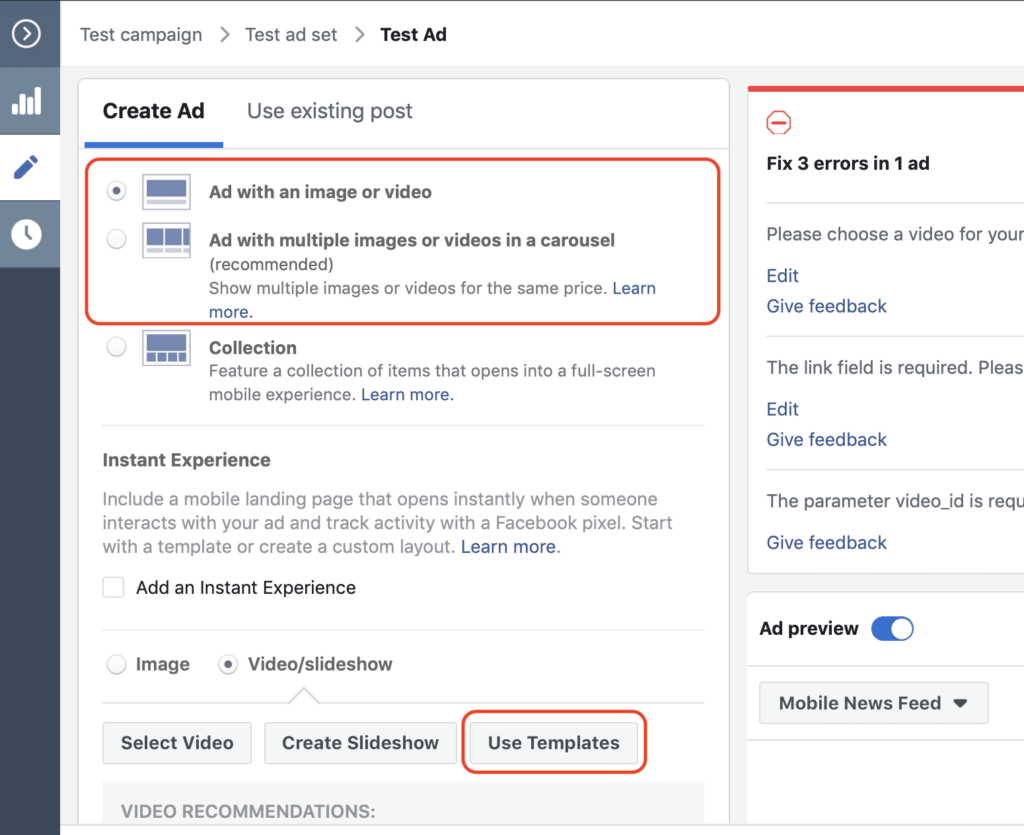
To find the Video Creation Kit tool, navigate to the Ad level of a campaign and with either the single video ad format or carousel ad format selected, select “Video/slideshow.”
Select “Use Templates” to open the Video Creation Kit.
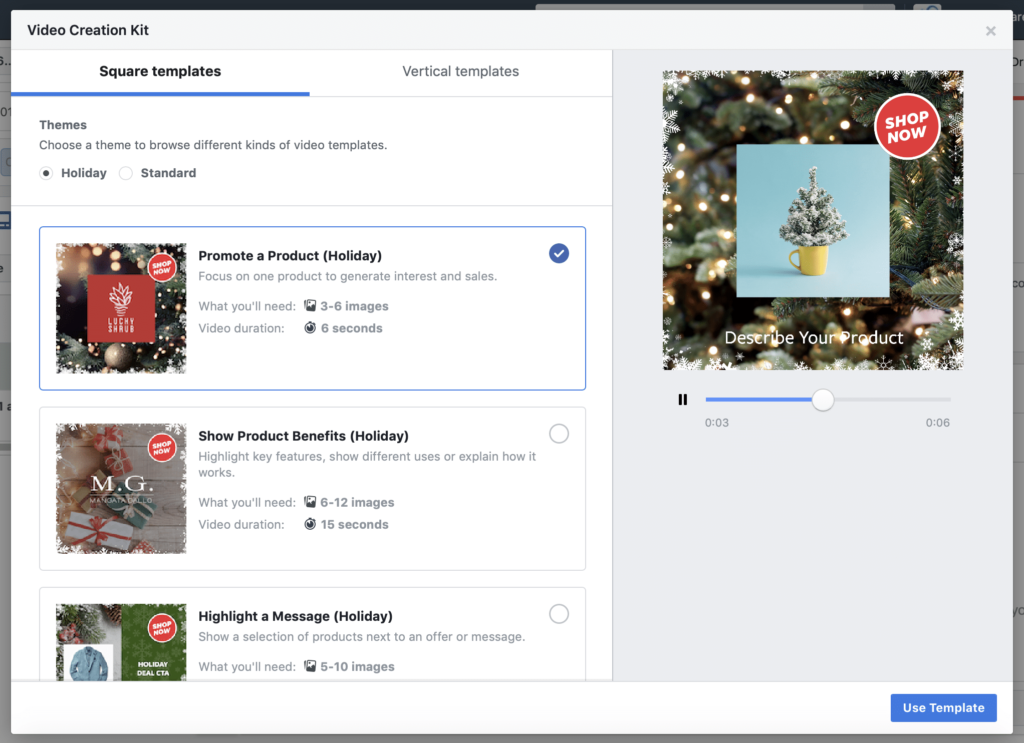
With Video Creation Kit you have multiple options on how it looks depending on your goal for the video as well as the actual format of the video.
Facebook have also introduced themes based on the time of year. Currently, at the time of writing this article, the latest theme is “Holiday Ready for Christmas”.
Choose Your Video Format
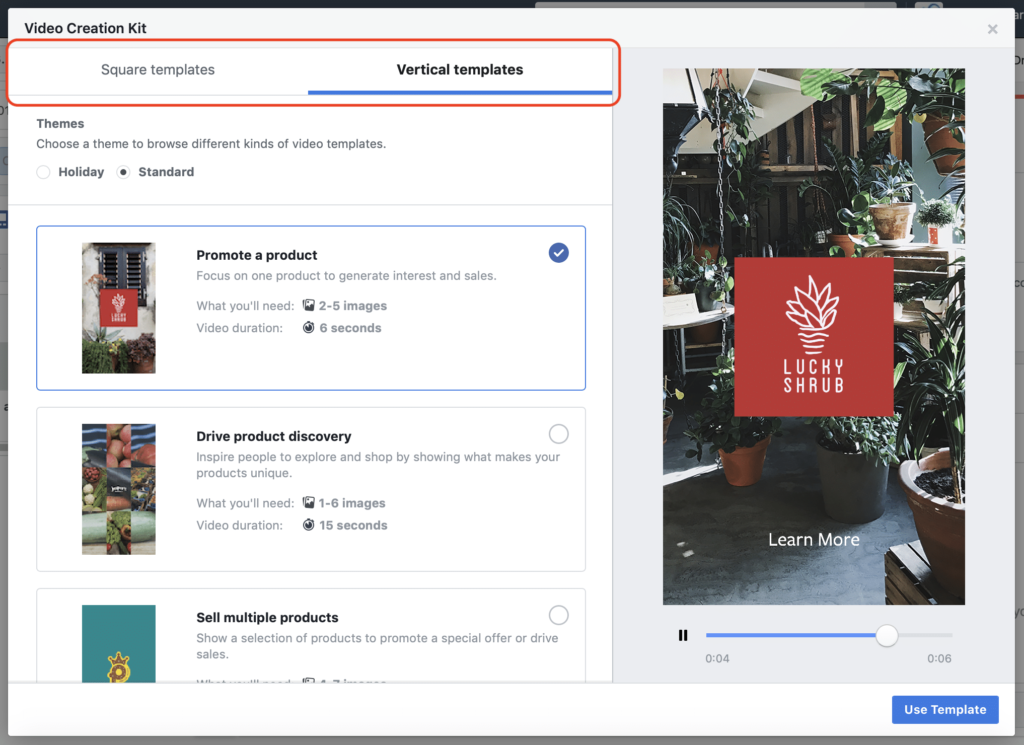
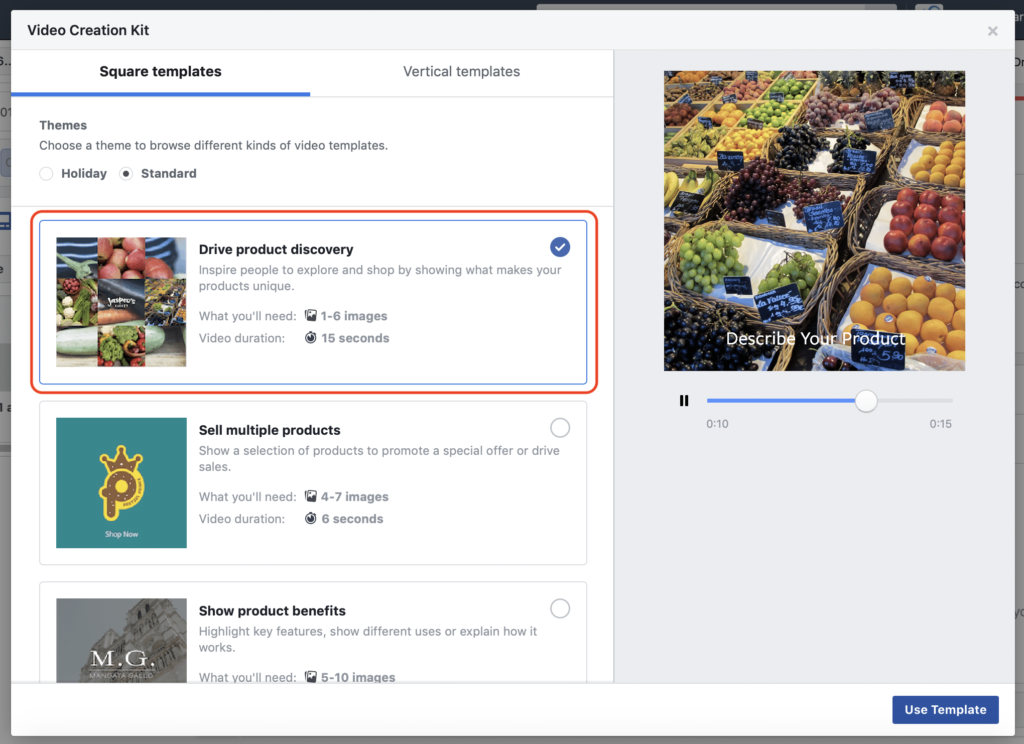
The first decision you have to make when using the Video Creation Kit is to decide your format for the video. You can choose between square and vertical.
Interestingly, there’s no option for regular wide screen 16:9 format. Facebook has decided to only give square and vertical formats which take up more of the newsfeed which is proven to lead to higher engagement rates.
TIP: I’d recommend using the square video format, as it’s a more common format than vertical, so you can use square images that you’ve used in previous carousel ads or Instagram ads.
Choose Your Theme
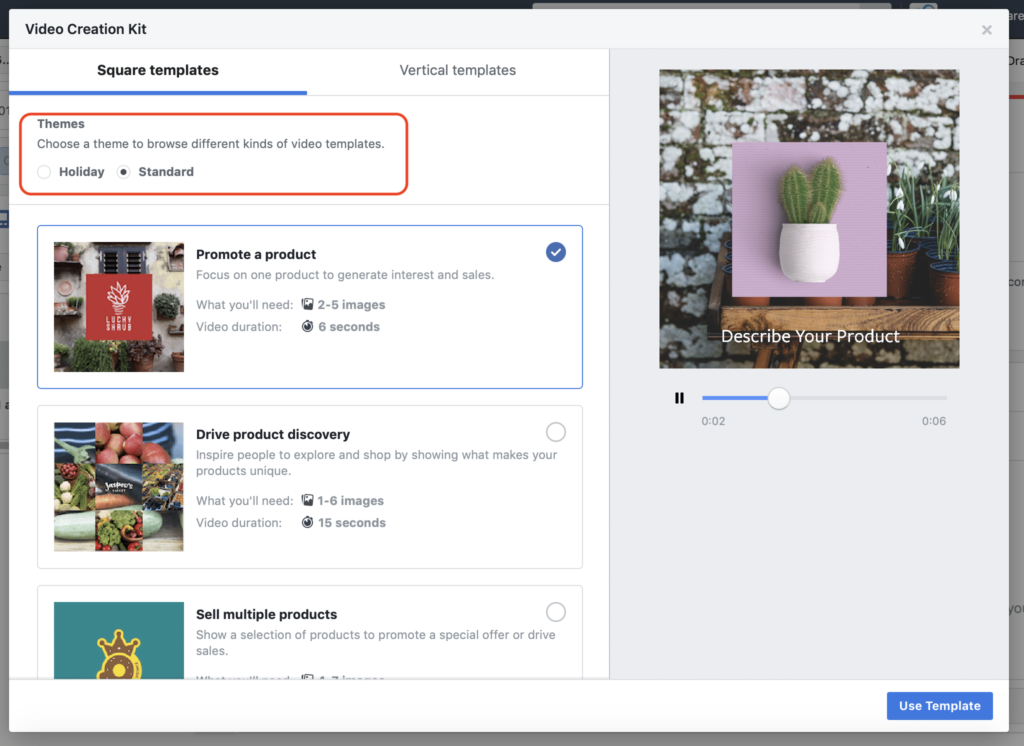
Next you want to choose your theme. There are two themes available: the standard theme and the holiday theme.
If you are running holiday promotions, then it makes sense to use the holiday theme for greater ad relevancy. However, if you are going to be running more evergreen ads outside of the holiday period then use the standard theme.
Simply select the theme you want to use and the templates below will change accordingly.
Choose Your Template
The final element you need to decide on before you actually create your video is the template. This will depend on the goal of your ad and what you are promoting.
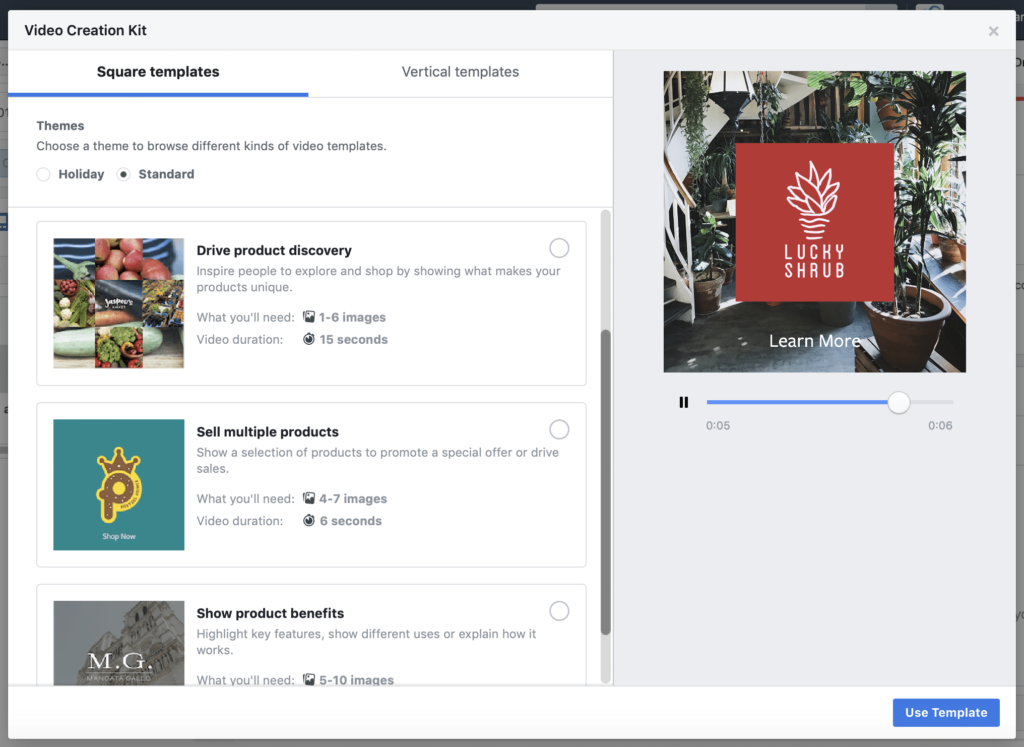
There are five different templates, which vary in image requirements and subsequent video duration. You can use from 1-10 images and videos range in duration from 6 seconds to 15 seconds.
Templates are named according to your goal of the video and include:
- Promote a product
- Drive product discovery
- Sell multiple products
- Show product benefits
- Showcase a square image
All of the templates are rather basic at the moment and require a different number of images, which in turn result in different video lengths.
The Most Useful Template
We’ve found the most useful template to be ‘Drive product discovery’. Compared with the ‘Promote a product’ and ‘Showcase a square image’ templates, it uses more attention-grabbing animations and features multiple images.
One of the best ways to use this template is for a single product offering, with multiple product images, not just for use with images of different products, like in the video preview.
This type of video creative is best used at the bottom of your sales funnel. Combine this video creative with a product testimonial in your ad copy, as part of the RTM Method, for an even more effective ad.
How to Create a Product Discovery Video
First select the Drive Product Discovery template. You’ll need 1-6 images and the video duration will be 15 seconds.
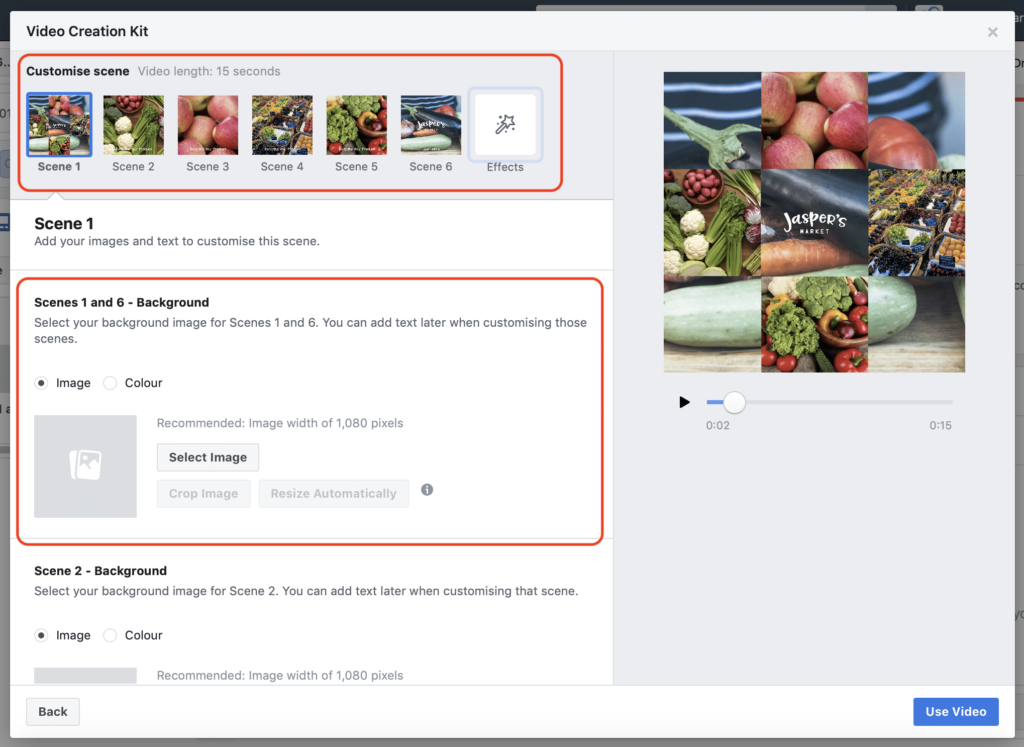
Once selected, click on Use Template. This will take you to a new view with the different scenes and the image, background and text options for each scene.
With Scene 1 selected, choose your background image for scenes 1-6. This will be the opening and closing image that appears in your video. The other images are overlaid during the first animation.
Next, choose the remaining images for scene 2 to 5. Choose a different image of the same product for each scene.
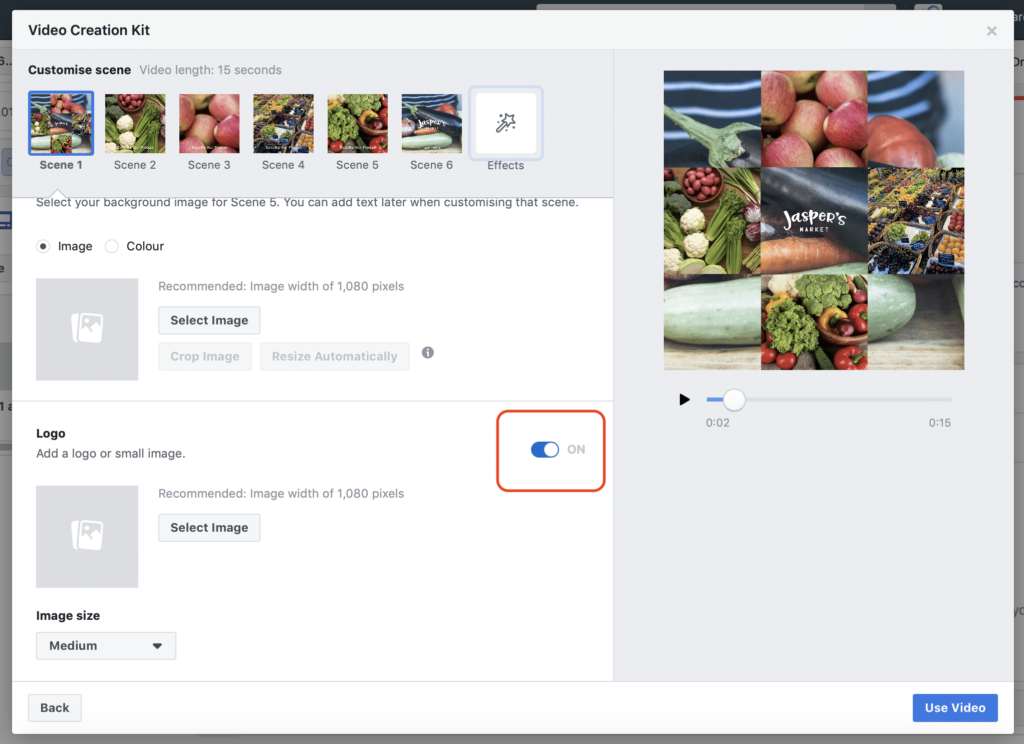
Finally, before we move onto the text section of each scene, at the bottom of the window you can add your logo to the video. This will appear in the centre of your starting image as well as at the end of the video and can be either small, medium or large in size.
In this example, we are using the video at the bottom of our sales funnel to re-market website traffic and therefore we’ve turned off the logo option.
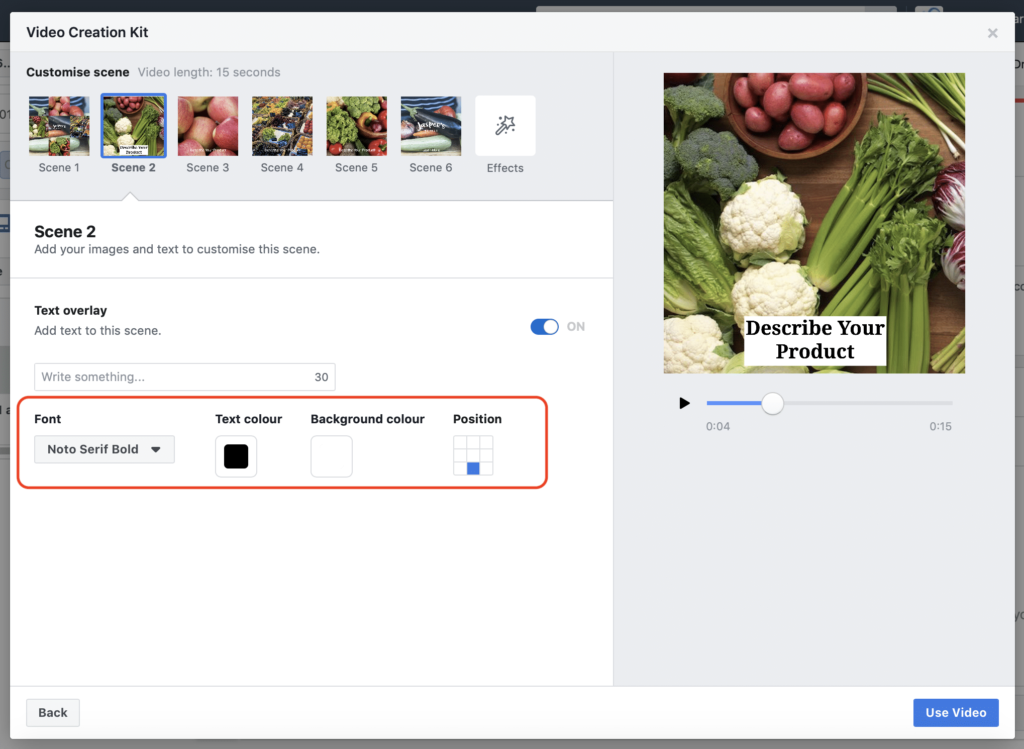
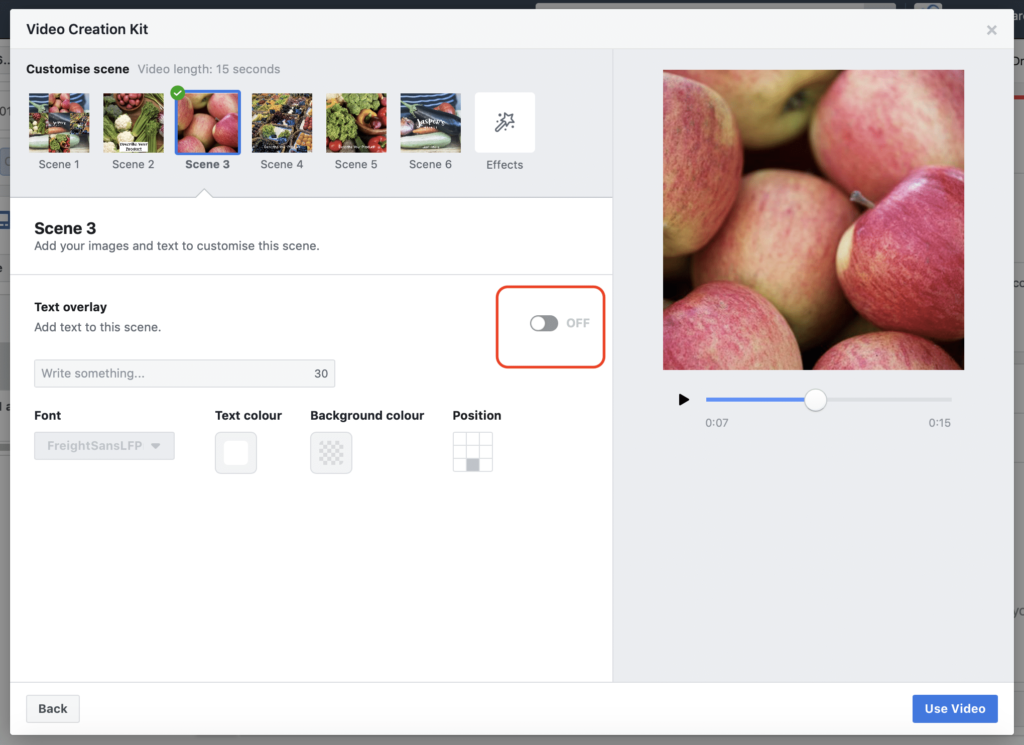
Next, you can set the text on each of your images. Current character length is only 30 so it has to be short and concise. You can change the position of your text on the image as well as the text color, background color and font type.
One of my favorite fonts is Noto Serif Bold with contrasting text color and background. Black text on a white background grabs attention really well on the different images.
To add text to the next image in your video, simply select the next scene from the top row. With the Product Discovery video you can include text on scenes 2 to 5.
If for any reason you don’t want to include text on a particular image or completely remove text from the video and let the images do all the talking, you can simply toggle off the text option for each scene.
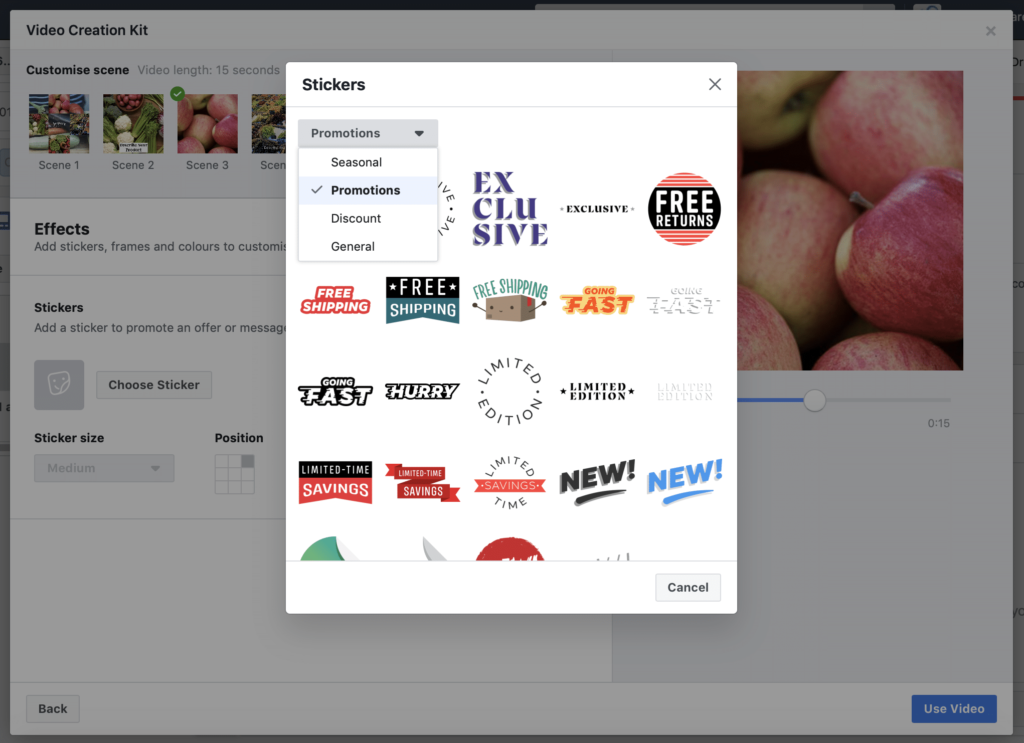
Finally, you want to select an effect. Effects are just a sticker that you can add to your video that emphasizes a particular feature or benefit such as a discount or free shipping.
There are four different categories of stickers: General, Promotions, Discounts and Seasonal. There are over 120 different stickers to choose from in a range of designs and colors. You’re sure to find one that matches your brand guidelines.
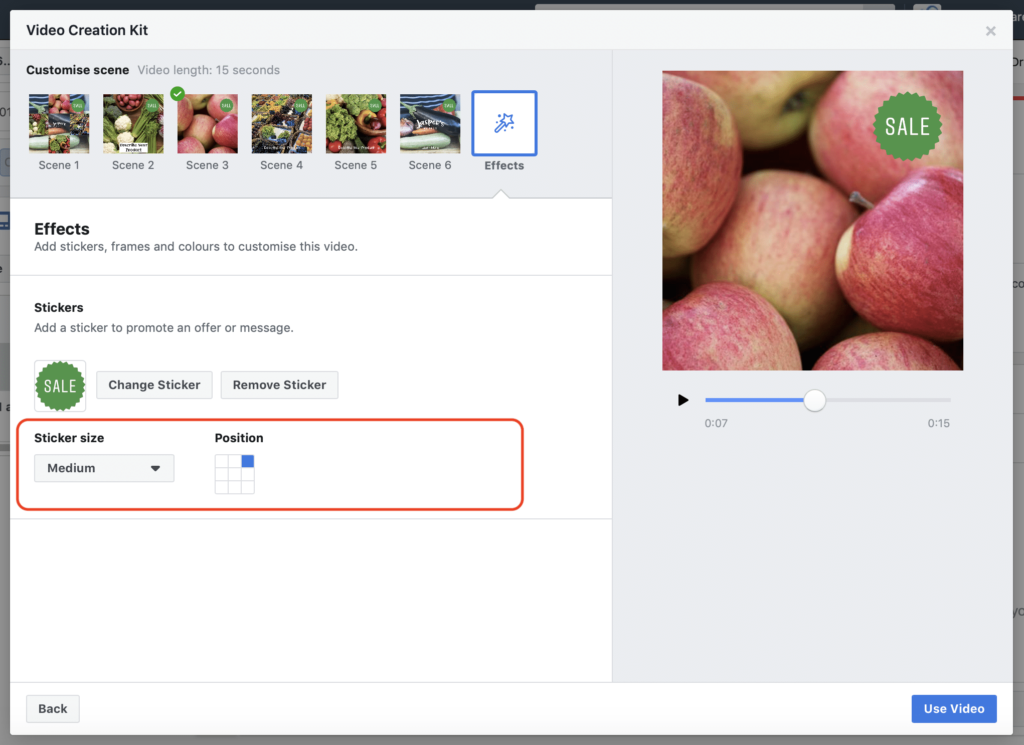
You can choose the size and placement of your sticker.
The sticker will appear on each image in your video and you can only use one per video. You can’t select a different sticker for each image and you can’t upload your own. However, I’m sure those features will be coming in later iterations of the Video Creation Kit.
Once you are happy with your video and you’ve checked the preview of it on the right side of the window, click Use Video in the bottom right. This will create your video and add it to your ad.
You can then complete the rest of your ad components such as ad copy, headline, URL and Newsfeed link description.
Conclusion
There you have it, how to use the new Video Creation Kit to create an engaging Product Discovery video.
Although this tool is in the first iteration and the features are limited you can still use it to create more engaging product-based videos compared with just the regular slideshow tool.
As the videos are short in length, under 15 seconds, I’d recommend using it for website re-marketing campaigns targeting people that have visited your site but not converted yet.
Are you excited to try Facebook’s new Video Creation Kit? Let me know in the comments below!
